Butternut squash Soup

If you have ever eaten butternut squash soup, you know just how delicious it can be. If you have ever made it, you know that there isn’t just butternut squash in it; a lot of people don’t know this. A lot of people should because it is super easy to make!

I usually take the “what do I have that is about to turn” philosophy when making this soup, with everything going on now I really had some random stuff to use. You can really use anything you have at any combination if it fits the texture and savory/sweet profile. What I mean by that is that you shouldn’t substitute zucchini for sweet potato or throw in something like brussels sprouts, you’ll know if something wouldn’t fit quite right.

Here is my guide to a delicious soup!

Like I said before, I had a bunch of random stuff in the house so the following is what I used, I didn’t measure amounts because you just need the broth:vegetable ratio to be right. You will need to just cover the vegetables in the pot with the broth, not too much over the top of the vegetables; just to the point where they are covered. Following is what I used to use as a guide:

  • 1 butternut squash, peeled and cubed
  • 2 yellow potatoes, peeled and cubed
  • 1 large carrot, peeled and sliced
  • 1/2 medium onion, chopped
  • I stalk of celery, chopped
  • 1/2 of a large daikon radish, peeled and chopped
  • 1 sweet potato, peeled and chopped
  • 1 32 oz carton of chicken bone broth (you can use vegetable broth for a vegetarian/vegan version)
  • 2 tbsp butter
  • 1/4 cup coconut milk (see note)
  • 1 light tbsp curry powder
  • Dash of cayenne

[Note: I use coconut milk and curry because I like that flavor combination. If you don’t like it, use a dash of nutmeg and finish with a dollop of sour cream in each bowl]

I put the butter in a 5 qt stack pot and melted then added the vegetables and sautéed for about 5 – 7 minutes, just wanted to get the onions a little brown and on the softer side. I added the broth, curry, cayenne and salt and pepper then cooked for about 45 minutes.

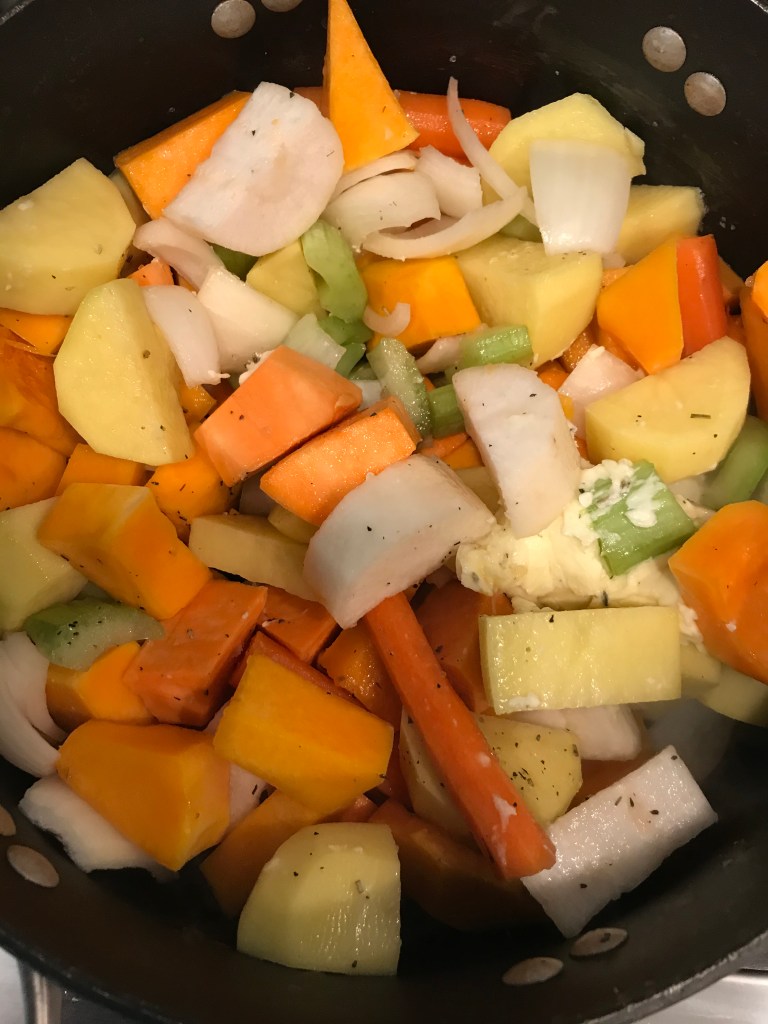
You don’t have to worry about size so much as consistency. Here are my vegetables in the pot, they will be blended so the size isn’t an issue as long as they are all about the same size for cooking time.

I transferred The softened vegetables to my Nutribullet and puréed, you can use a blender if you like too. I moved the vegetables, straining a lot of the liquid off so I could add it back to my desired consistency; add just enough to allow the blending mechanism to do the work. I added the puréed soup back to the stockpot and finished with some broth to get almost a thin as I would like then topped off with coconut milk.

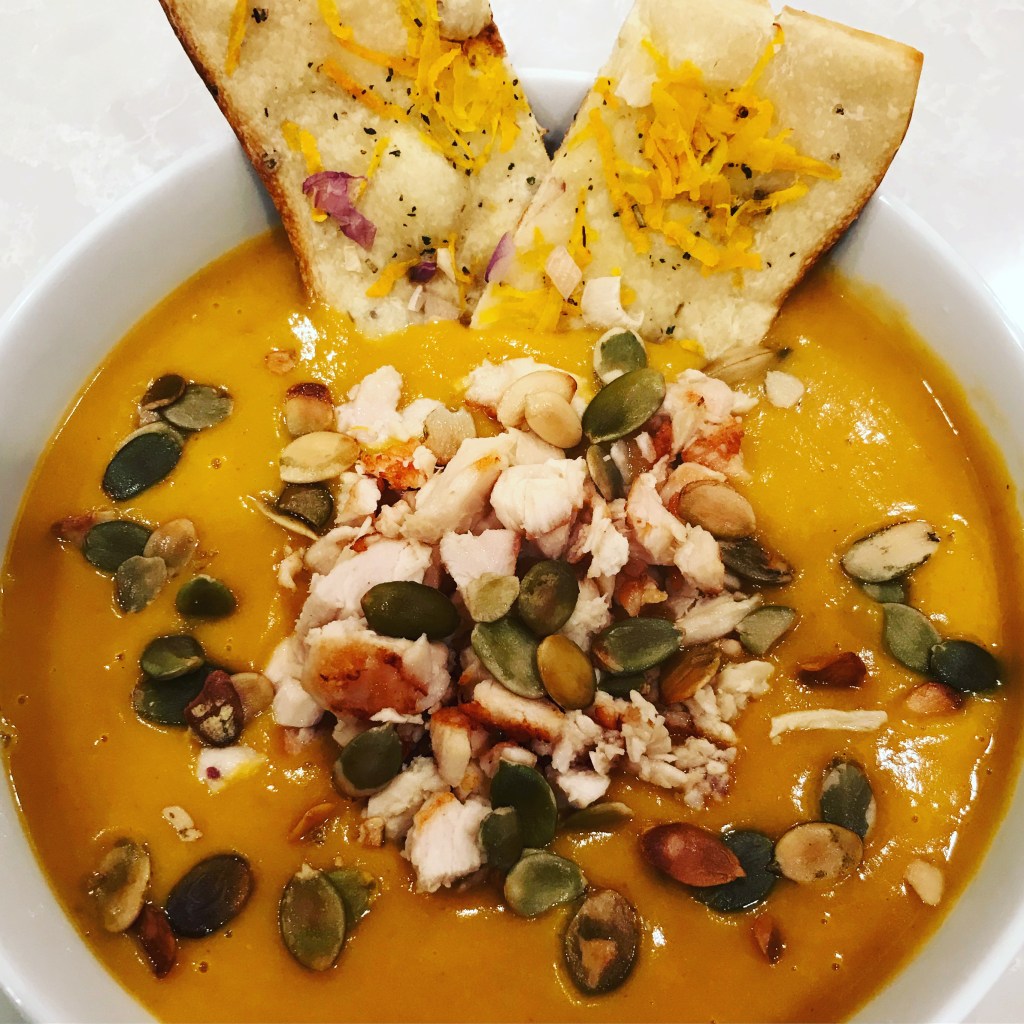
After I put it in the bowls, I added some crisped up leftover chicken breast and pumpkin seeds. You can add anything to the bowl that you like to give it some texture, some are good suggestions:

  • Bacon (um, yeah!)
  • Sour cream
  • Pecans
  • Rice (wild rice would be great)
  • Orzo
  • Quinoa
  • Farro
  • Leftover pork
  • Anything you think would be good, it is your food so make it your own!

Lastly, you can either roast the vegetables or put them in a crockpot but I have found problems with both of those options. I am not trying to discourage you from trying it, just letting you know this method has returned the best result for me. Enjoy!

Pork Fried Rice (or chicken, vegetable, beef, etc…)

So easy, so good….

A couple of notes:

  • If you don’t have leftover rice (I usually do not), you can cook the rice 5 minutes longer than the recommended time to dry it out a little more.
  • I use Basmati rice but you can use any kind (except instant or microwave type rice, it has some weird coating on it). Yes, you can even use cauliflower rice, couscous or quinoa!
  • You can use any type of meat, I always use leftover meat unless I am using pancetta which wouldn’t be leftovers. Cook pancetta from raw.
  • You can use any kind of vegetables, fresh or frozen, in this dish. I stick to the traditional.
  • There is no sarong way to make this, my recipe is a guide so make any changes, substitutions you think you will like.

What you will need:

  • 3 c. of rice
  • 1/2 c. meat (see note)
  • 3/4 c. diced vegetables (I use carrots, peas and onion)
  • 1/4 c. soy sauce
  • 2 tbsp. sesame oil (plus 1 tbsp)
  • 2 cloves of garlic, minced
  • 1 tsp fresh grated ginger (or a pinch of powdered)

Whisk together soy, oil (2 tbsp), garlic and ginger, set aside.

Add 1 tbsp of sesame oil to a frying pan or wok and add the meat and vegetables, cook until soft At medium heat. Add rice and liquid mixture then stir to combine, increase to medium high heat and cook until rice starts to become “crispy” on the bottom. That’s it, super easy!

Ginger Honey and Soy Chicken Thighs

This is a long blog about a really simple dish, I talk about more stuff here so be patient or just scroll down to get the recipe.

Let’s talk chicken for a moment please, the debate can be polarizing: white meat or dark meat?

Both have merits and are excellent choices if used in the correct way. I realize everyone has specific preferences but this is a pretty good reference for use based on white or dark in case you are ever wondering if a substitute for the recommended type is a good choice (see note):

  • Fried Whole Pieces- White or Dark
  • “Nugget” Pieces Fried – White
  • Whole Roasted – White or Dark
  • Casseroles Or “One Pot” Dishes – White
  • Shredded (for tacos) – White
  • Cooked in a sauce whole – Dark

In whole: chicken breast tend to dry out when cooked for a longer period of time and thighs tend to have a “funky” flavor the next day; I would recommend making your own decision about this but I have never been able to eat thighs as leftovers.

Note: You know I always say “it is your food so make it your own” so please do this, I am only giving you my recommendation based on my experience. Yours may be different, keep trying to find what works for you.

Let’s start with the meat, I use boneless skinless thighs here for a couple of reasons: thighs tend to have a better flavor and retain moisture and the skin would get soggy during this process. If you use bone-in with skin, just let it cook for an additional 10 minutes during the baking time and an additional 2 or 3 under the broiler; watch it very closely under the broiler.

What you will need (I am just using 1 lb as a start, scale to the size you purchase and it doesn’t have to be exact but err on the side of more than less marinade)

  • 1 lb. boneless skinless chicken thighs
  • 1/4 c. honey
  • 2 1/2 tbsp soy sauce (coconut aminos Can be used for gluten free)
  • 1 chopped green onion (slice 3/4 of the onion starting from the root, the rest is for finishing the dish)
  • 1 tbsp cooking oil (canola, vegetable, etc)
  • 3 cloves of garlic, minced
  • 1/2 tsp sesame oil (optional but really adds nice flavor)
  • 3/4 tbsp apple cider vinegar (can use white but not as good)
  • 1/2 tsp freshly grated ginger (if you use powdered, use just a pinch)
  • salt and pepper

What makes this dish really good is the fact that the chicken is prepped via marinade so mix together all ingredients (except the chicken, salt and pepper) in a large bowl of container you can use to marinade.

Note: I like to use large zip-loc bags so I can turn the bag to ensure full exposure to the all pieces in the marinade.

You will want to dry the thighs with a paper towel to ensure proper adherence of the salt. Generously apply salt and pepper to the thighs then place in the marinade, refrigerate for a minimum of 1 hour up to 24 hours.

Pro Tip: When you watch chef’s prepare food, you will see them salting using their fingers pretty high above the dish and there is a reason for this. Over-salting is the worst thing you can do and sporadic salting is the second worst, you want to salt evenly and with control. The only way to really do this is by using your fingers and “pinching” some salt and distributing from maybe 12” above the meat. The distance encourages the salt to disperse in a way that it lands over the entire surface instead of concentrating in one place like with a shaker. Just a tip, use your judgement.

Place everything (chicken and marinade) in a low sided oven safe pan like a cast iron or braising pan and bake at 425 for ~25 minutes. Just watch it for overcooking on the tops, I turn the chicken about halfway through to ensure proper saturation; broil for about 5-7 minutes to get the edges crispy. The final dish needs to reach 165 degrees to be safe.

Garnish with sesame seeds and the remaining 1/4 onion that will you have chopped in the interim. That’s it, Enjoy!

I served with pork fried rice and roasted broccoli. Click the links for the rice recipe and the broccoli is just below (so easy, didn’t need its own blog post).

Take the amount of broccoli you would need to the people you are feeding and separate the florets and slice the stems. Place on a lined baking sheet, drizzle olive oil and garlic over the broccoli, toss to coat and place in the oven with the chicken. It will cook for the same about of time as the chicken.