
Seriously, this recipe takes maybe 2 hours and the hands on time is almost nothing. Two things that are important here are a digital food scale and a thermometer because you don’t want to kill the yeast. I’ll provide notes on making this without a scale but the thermometer is super important. Trust me, you’ll love I!
What you’ll need:
- 360 grams of flour (see note)
- 9 grams active dry yeast (just under 9 is fine, don’t go too much over 9 grams)
- 1 tsp coarse sea salt
- 1 1/2 cup water (109-110 degrees)
[Note: I prefer King Arthur brand flour because of its protein content but, honestly you can use anything (including 00 flour which makes your bread super soft) for this bread. I prefer to use King Arthur Bread Flour because of the density and texture, I would recommend you start with this and try another kind after just for comparison.]
If you are not using a scale, 360 grams is just under 3 cups (seriously, like 1/8th of a cup less) but you have to sift your flour or stir it really well. You never want to “scoop” the flour with your measuring cup unless you really aerate the flour first, you’ll end up with a dense brick of bread-like garbage. Put 3 cups in a bowl and run a whisk through it several times and spoon the flour into your measuring cup to get just shy of 3 cups.
Place the flour, yeast, and salt into a medium sized bowl then whisk it all together making sure it’s incorporated well; add the water and mix just until combined. Cover with plastic wrap and set somewhere warm to rise for an hour; in the summer, I set it outside when the weather is mid 70’s to mid 80’s.
It can’t be too warm or too cold because the cold will take longer and the hot will rise too quickly and cause it to be “over proofed”. Don’t worry about it too much, I’ve yet to have a rising problem just by shoving it in the outside corner of my kitchen but beware of extreme temps.
Gather your pan which should be of a heavier material with a lid that can withstand very high heat. I use a cast iron Dutch oven with a fitted lid but you can even use a metal bowl with aluminum foil, just make sure to test the temp of the bowl.
After 45 minutes into the first rise, place the pan (with the lid) into the oven and set temp at 450.
Once the first rise is done (1 hour), the dough should be almost doubled and maybe a little bubbly (small surface bubbles). Dump it on a floured surface* and fold over itself maybe 4 or 5 times adding flour where it’s sticking. Don’t add too much, just make sure the dough isn’t really sticky in places. Place the dough into an oiled bowl for the 2nd rise. I just pour a small amount of olive oil into the pan and toss it around to cover the dough ball.
[* The dough may stick to the bowl a little but that’s okay because you’ll add more flour at this stage, it just shouldn’t be “wet” or dry.]
Place a cotton towel over the bowl and put in the same warm place for 30 minutes to rise again.
When the 2nd rise is done (it should be more voluminous with some bubbles), remove the pan carefully from the oven and dump the dough into the hot pan. You may have to cajole the dough out with a rubber spatula but it should release easily and you shouldn’t see and raw flour. Place on the hot lid and bake for 30 minutes.
When 30 minutes is up, you can either remove the lid and bake for another 15 for a crispier crust or set on a cooling rack for a softer bread. That’s it!
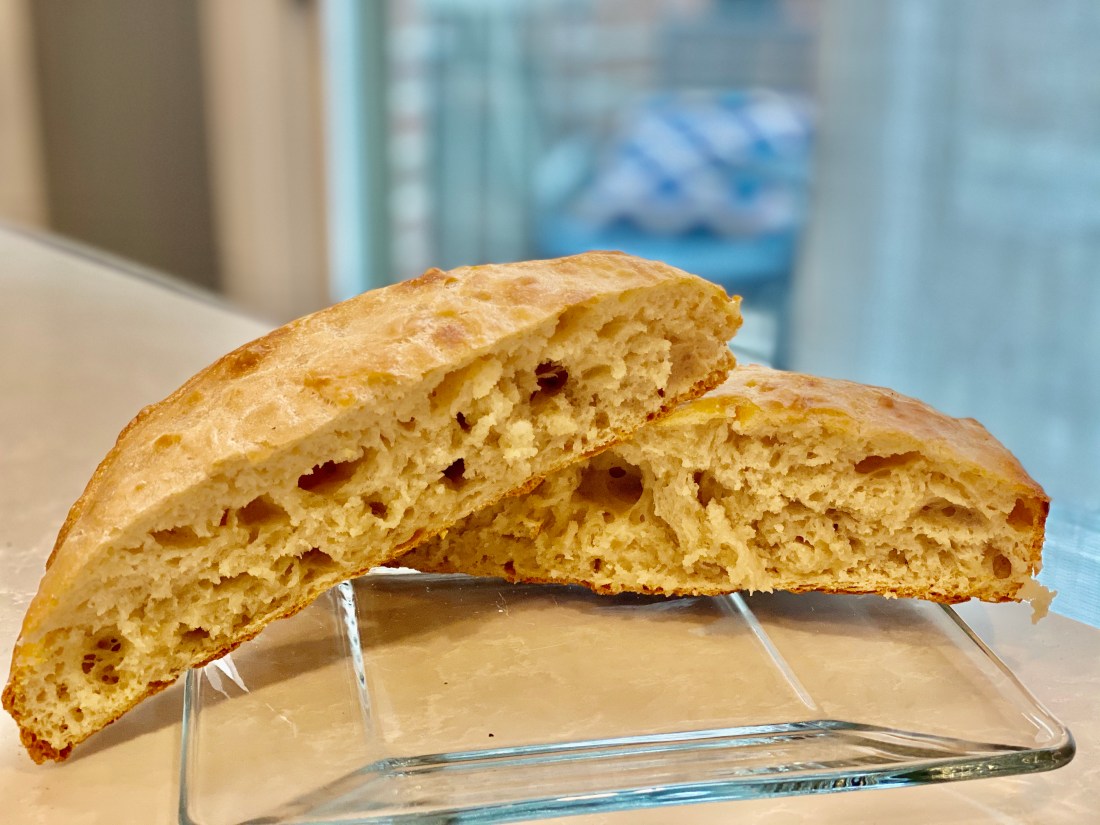
Really, it’s super easy and oh so good! I often throw in jalapeño and cheddar or roasted garlic or Italian herbs, everything bagel seasoning, anything to flavor the bread in way you will love. I mean, it’s bread, you can’t go wrong. Just put it in with the first mix and make sure it’s well incorporated. It’s your food so make it your own!
I hope you enjoy this as much as we do, it’s so good to use with sandwiches, toast French toast, croutons, etc. Please do let me know how you like it!

One thought on “Fresh Made Crusty Bread in a Hurry!”