Go big with the biscuits!

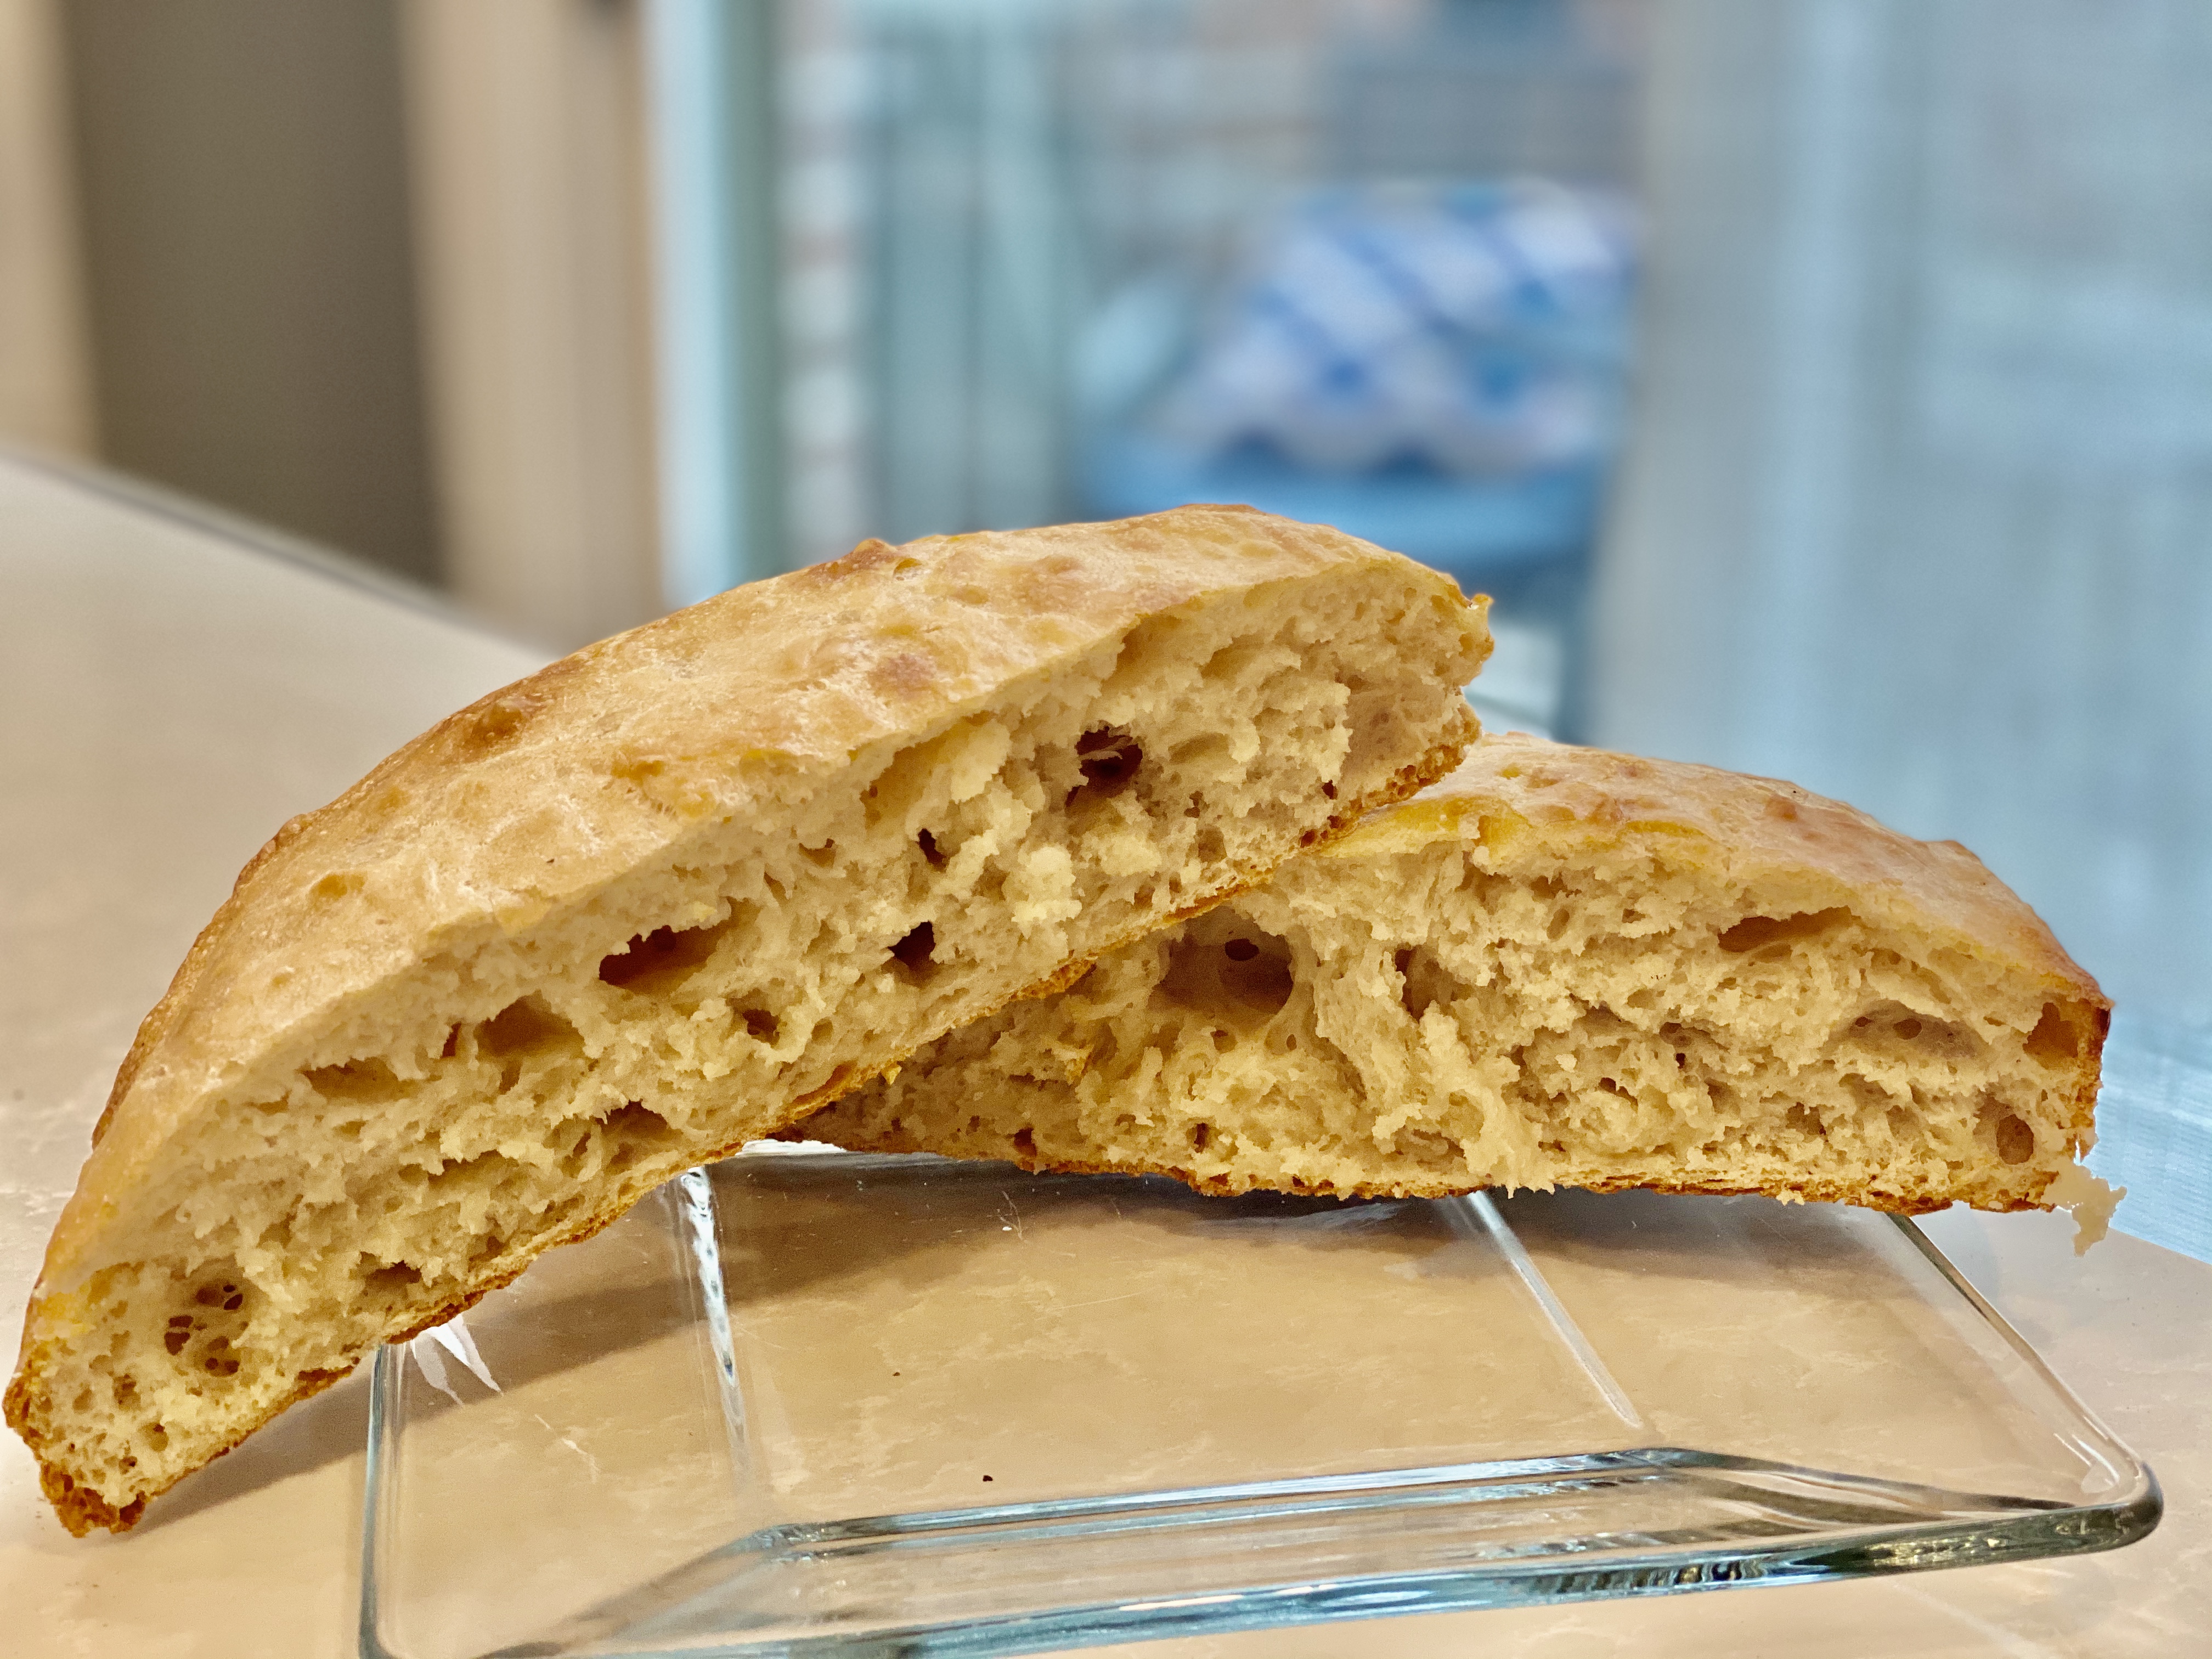
Okay so knowing you are going to have a soft pillowy biscuit hot out of the oven is truly exciting but calm down, that excitement could ruin your product. A couple of things to remember:

  • Biscuits do not like to be touched, do not over work your dough
  • Everything should be COLD, as cold as you can make it
  • Do not open the oven to “just check on them”, you’ll alter the temperature and prevent the most effective environment for the steam and rise…..
  • Biscuits are not hard to make

I always keep a couple of sticks of butter and flour in the freezer for biscuit or pie crust so I always have it on hand; this is only a good idea for you if you bake a lot. The kind of butter isn’t critical but I can make your biscuits better for sure. I like Kerry Gold unsalted butter, NEVER buy salted butter*, but you really can use whatever kind of unsalted butter you have. I like any kind of European butter because it has a higher fat content which helps in the science of the rising and flakiness of the biscuits.

[Note: The reason you should never buy salted butter is because you want to control the amount of salt in everything you make, you have no idea how much salt is in salted butter so you will have no idea how it will affect the flavor of your dish!]

People swear by White Lily Flour but I like King Arthur, there are so many options. Don’t obsess over the brand of flour because biscuits were originally a staple in kitchens of poor people because of the cost to make them, they didn’t use “the best” flour but they sure made the best biscuits!

Over handling your dough will develop an amount of gluten strands that will make your dough tough, gluten strands are strong; you don’t want your biscuits to be strong. These biscuits call for a quick knead (no more than a minute in a half) because you do not want to heat the butter and affect the quality of the baked biscuit.

General baking info: Heat is important because it leads to a better rise so make sure you fully pre-heat your oven by waiting 10 minutes after it has indicated it is pre-heated to the appropriate temperature. When able, use the center rack and never over crowd the oven as that will cause the temperature to drop. Now, on to the biscuits….

What you will need:

  • A box grater, pastry cutter or a fork
  • 2 1/2 cups all purpose flour
  • 12 tbsp butter
  • 1 tbsp baking powder
  • 1 tsp salt (use coarse kosher or sea salt)
  • 1 1/2 tsp sugar
  • 1/4 tsp baking powder
  • 1 cup buttermilk

Place all of the dry ingredients in a large bowl, mix them together well and grate the butter (see note) into the mixture using a paper towel to hold the butter so your hands do not warm it; this is really important.

Why is it important? Cold butter creates steam as it melts in a hot oven, the steam from the melting butter expands between the layers of dough which creates pockets of air, yielding a flaky biscuit (or anything else you are making using butter so use this tip for all pastries, etc.).

[Note: I use a box grater because it is the quickest way to get evenly sized pieces of butter but you can also use a food processor for the same effect; I just really hate cleaning that giant thing. If you use a food processor, only use it for the butter because using it for the biscuit dough would make it tougher. If you are using a fork or a pastry cutter, I would “cut” it outside of the flour and put it in the fridge for about 5 minutes to cool it down before adding it to the flour.]

Once you have placed the butter into the flour mixture, mix around to “coat” the butter pieces in the flour and dump in the buttermilk. Use a fork to mix everything together until it starts to come together then dump it out onto a floured surface.

Fold the mixture over itself a couple of times to create “layers” of dough. Fold, turn, fold, turn, etc. Gather anything that isn’t fully incorporated along the way, just scoop it up as you turn the dough. DO NOT HANDLE THE DOUGH TOO MUCH! If you do, you will have flour bricks, do the fold and turn for no more than one or one and a half minutes!

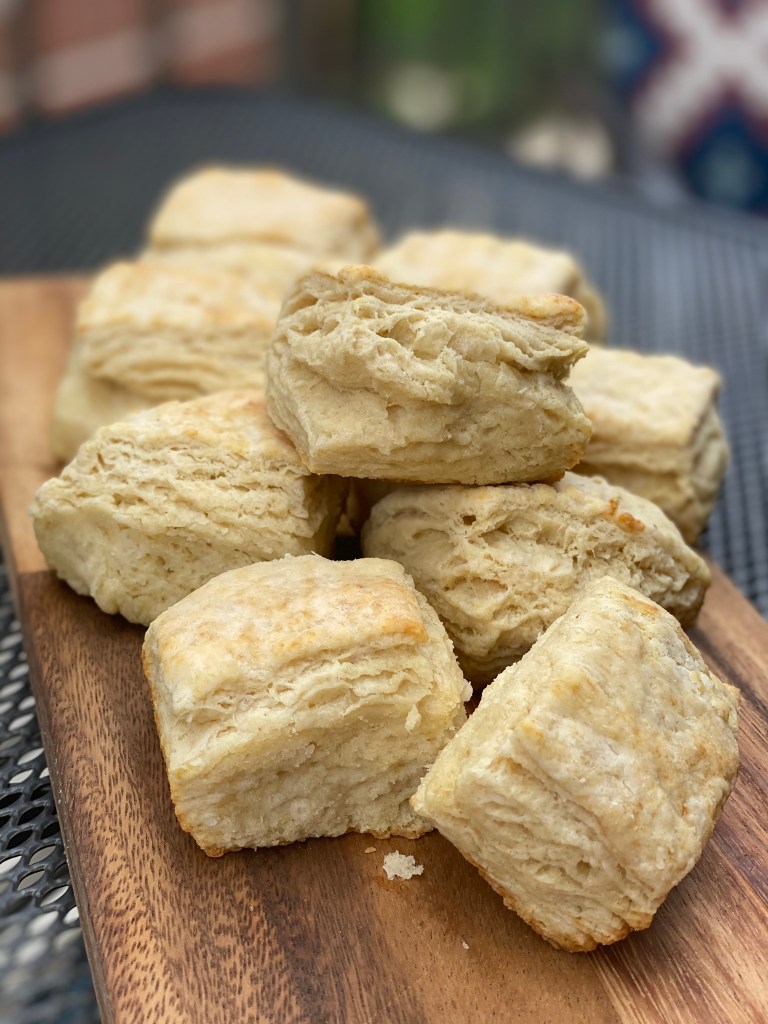
Roll out the dough with a rolling pin to maybe a 1/2” thick rectangle and grab what you are using to cut the biscuits. I use a knife and cut square biscuits so I don’t have waste and don’t have to handle the dough too much. Whichever mechanism you are using to cut, be careful so you don’t “pinch” the edges which prohibits rising.

If you use a pastry cutter or glass to cut them, do not turn as you cut; a quick down and straight up is best. If you are using a knife, just slice straight down with a sharp long knife.

Use butter or Crisco to grease a pan, I use either a cake pan or 9×13 baking pan with higher sides so the biscuits rise more; I have always found that biscuits “touching” while they cook results in a higher and better rise. Place the biscuits on the pan and brush with some heavy cream or melted butter and bake in a 400 degree oven for 12 minutes.

If they aren’t as brown as you like, you can place them under a broiler to do that but I always burn them when I try using the broiler (it happens fast!) so I don’t recommend that. At all.

Once they are done, brush them with a little more melted butter and try not to eat them before anyone else can try them; it makes about 12 biscuits But don’t judge me please. Enjoy and after you try the original, add some flavor like garlic, herbs, cheddar, lemon, etc. It is your food so make it your own!

Egg Salad: don’t let the name fool you, it is definitely not boring!

Of course the most important thing about egg salad is how you cook the eggs and I definitely have a preference: hard cooked. I like the additions to the egg to flavor the salad but you certainly can cook them less and allow a creamier yolk to reduce the additions. I will provide information for both but whatever you do, don’t let anyone tell you more yolks aren’t better; they make the dish!

Now for the eggs, I will use 6 for this blog…..

Start a pan large enough to fit the eggs filled half full of water over high heat (make certain the amount of water will cover the eggs when you place them in the pan), make sure it has a tight fitting lid. When the water reaches a rolling boil, remove the eggs from the refrigerator (they need to be cold) and place in the pot with a slotted spoon, add a tablespoon of baking soda and put the lid on the pot. Turn off the heat.

Let the eggs sit for:

  • 12 minutes for hard cooked
  • 9 for medium cooked
  • 7 minutes for soft cooked

Just before you have reached the desired time to let the eggs sit, make an ice bath in a bowl large enough to hold your eggs and not send water over the edges when you put them in the bath.

Once they have set for the time you desire, dump the hot water but leave the eggs in the pot.  Put the lid back on and shake the pot well, banging around the eggs to really crack the shells. Remove the lid and dump the eggs in the ice bath, let sit for ~5 minutes. The eggs should slip right out of the shells.

[Note: You want to make sure the eggs are not warm when you begin to assemble the egg salad so let them sit in the bath until they no longer feel warm on your hands.]

Now let’s talk about texture, you know how I feel about texture because I talk about it a lot…..

The best method for achieving the best texture of your eggs is a potato ricer, seriously just get one please. You can use it for the fluffiest mashed potatoes (see note), the smoothest cauliflower puree, easier avocado mash for guacamole, juicing quartered fruit, smashing bananas for banana bread, the list goes on and on for a tool that costs an average of $30! This is the one I have and I have had it for about 10 years, no issues and I use it on the regular!

[Note: if you boil whole potatoes for your mashed potatoes, the ricer will PEEL THEM FOR YOU! No more grated knuckles or grating your skin with that terrible peeler! Just place the hot potatoes in the ricer and press, that’s it!]

Take four of the eggs whole and place in the ricer, discard the white from two of the eggs and put the yolks only in the ricer; apply the plunger and “rice” the eggs.  Look at the consistency of these eggs, it really does make a difference!

D3292946-6A57-47AF-ADE7-98B416AB8C60

Set the riced eggs aside to cool a little more and start assembling your mise en place (your ingredients ready to mix), this helps with clean up.

I like to add the following to my egg salad but use it as a guide, add whatever you like. One thing to remember is that I purchase things I can use again for other purposes which is why I chop pickles, I can use them for another purpose instead of having a jar of relish but I wouldn’t usually use relish anyway because of the extra liquid, just an example of making your money/purchase go further:

  • Mini sweet pickles finely chopped (you can use sweet relish but it is a little watery so it can affect the final texture)
  • Fresh dill minced (you can use dried too)
  • Mini dill pickles or cornichon if you can find them (you can also use dill relish but, again, it is watery and can affect the final texture)
  • Mayonnaise (of course use Duke’s if you can find it but I make mine often, it is really easy and you have everything in your house!)
  • Dijon mustard
  • Yellow Mustard
  • Smoked Paprika
  • Cayenne
  • Salt and Pepper

Set it all out, chop the things that need chopping and have everything ready to add as you need it.

C71E2945-5B85-48FF-888B-627624C8995A

For six eggs, I usually start with ~1 tbsp of mayo because you don’t want it to be too “runny”, I add in a generous squirt of yellow mustard, a tsp of Dijon, a small dash of cayenne, ~1/2 tsp paprika, three small pickles (sweet and dill each so six total) and about a tbsp of the dill. Mix together and add about three churns of sea salt and fresh pepper (from the mills) or a dash of salt and pepper. Sea salt only please, don’t use that crap in the round blue paper can…..

If it seems a little dry for your liking, I would add more yellow mustard. This will add more flavor without a significant amount of calories, more mayo gives it a more bland flavor. Add small amounts, mix well and evaluate for consistency; if you need to add more, just do it with very small amounts at a time.

The bread, the glorious bread. It is no secret how I feel about bread…..

The bread here is really important and I am a big advocate of making your own bread (click here for my easy and quick crusty bread recipe that you can make in ~2 hours!) because it can be used for so many things. Granted, it doesn’t last as long as store bought bread but that’s okay because it gets better with age for french toast, regular toast, croutons, bread pudding, etc. Just make a loaf and toast it up for a fresh egg salad sandwich!

There are two schools of thought on sandwich bread, soft and pillowy or thick and crusty; you need a hearty bread to stand up to a good egg salad. If you don’t want to make your own bread, buy one of the baked loaves from the market bakery because it is just a good! Whether it is homemade or store bought, slice it thick (discard the ends or save to dip in hummus!) and toast just enough to have the outside crusty but the inside remains softer.

That’s it really, slather some egg salad on the bread and enjoy while the bread is still a little warm from the toaster. Add whatever you like, think about some chopped arugula or spinach to bulk it up and add some texture, maybe some raw red onion or bacon to amp it up a little. Use whatever you have to make it your special dish, it’s your food so make it your own!

AA4A343C-5CC2-475C-BD54-F1E309DDBE03


Fresh Made Crusty Bread in a Hurry!

Seriously, this recipe takes maybe 2 hours and the hands on time is almost nothing.  Two things that are important here are a digital food scale and a thermometer because you don’t want to kill the yeast. I’ll provide notes on making this without a scale but the thermometer is super important. Trust me, you’ll love I!

What you’ll need:

  • 360 grams of flour (see note)
  • 9 grams active dry yeast (just under 9 is fine, don’t go too much over 9 grams)
  • 1 tsp coarse sea salt
  • 1 1/2 cup water (109-110 degrees)

[Note: I prefer King Arthur brand flour because of its protein content but, honestly you can use anything (including 00 flour which makes your bread super soft) for this bread. I prefer to use King Arthur Bread Flour because of the density and texture, I would recommend you start with this and try another kind after just for comparison.]

If you are not using a scale, 360 grams is just under 3 cups (seriously, like 1/8th of a cup less) but you have to sift your flour or stir it really well.  You never want to “scoop” the flour with your measuring cup unless you really aerate the flour first, you’ll end up with a dense brick of bread-like garbage. Put 3 cups in a bowl and run a whisk through it several times and spoon the flour into your measuring cup to get just shy of 3 cups.

Place the flour, yeast, and salt into a medium sized bowl then whisk it all together making sure it’s incorporated well; add the water and mix just until combined. Cover with plastic wrap and set somewhere warm to rise for an hour; in the summer, I set it outside when the weather is mid 70’s to mid 80’s.

It can’t be too warm or too cold because the cold will take longer and the hot will rise too quickly and cause it to be “over proofed”. Don’t worry about it too much, I’ve yet to have a rising problem just by shoving it in the outside corner of my kitchen but beware of extreme temps.

Gather your pan which should be of a heavier material with a lid that can withstand very high heat.  I use a cast iron Dutch oven with a fitted lid but you can even use a metal bowl with aluminum foil, just make sure to test the temp of the bowl.

After 45 minutes into the first rise, place the pan (with the lid) into the oven and set temp at 450.

Once the first rise is done (1 hour), the dough should be almost doubled and maybe a little bubbly (small surface bubbles). Dump it on a floured surface* and fold over itself maybe 4 or 5 times adding flour where it’s sticking. Don’t add too much, just make sure the dough isn’t really sticky in places.  Place the dough into an oiled bowl for the 2nd rise. I just pour a small amount of olive oil into the pan and toss it around to cover the dough ball.

[* The dough may stick to the bowl a little but that’s okay because you’ll add more flour at this stage, it just shouldn’t be “wet” or dry.]

Place a cotton towel over the bowl and put in the same warm place for 30 minutes to rise again.

When the 2nd rise is done (it should be more voluminous with some bubbles), remove the pan carefully from the oven and dump the dough into the hot pan. You may have to cajole the dough out with a rubber spatula but it should release easily and you shouldn’t see and raw flour.  Place on the hot lid and bake for 30 minutes.

When 30 minutes is up, you can either remove the lid and bake for another 15 for a crispier crust or set on a cooling rack for a softer bread. That’s it!

Really, it’s super easy and oh so good!  I often throw in jalapeño and cheddar or roasted garlic or Italian herbs, everything bagel seasoning, anything to flavor the bread in way you will love. I mean, it’s bread, you can’t go wrong. Just put it in with the first mix and make sure it’s well incorporated. It’s your food so make it your own!

I hope you enjoy this as much as we do, it’s so good to use with sandwiches, toast French toast, croutons, etc. Please do let me know how you like it!

E61EE602-4D58-4E29-AE90-18899A320A01

Friday Night Done Right: Spicy Paloma Cocktails!

So I’m a big fan of a spicy drink, any spicy drink but I think this one takes it over the top.  Be sure to invest in good, quality ingredients like fresh squeezed lime and grapefruit juice and good tequila; if you wouldn’t sip it, don’t put it in a drink. I’m not advocating you use Clase Azul Extra Anejo but I do think something a little more top shelf than Don Julio is in order but that’s just my opinion (I am a bit of a tequila lover so do what you think is best for you).

What you will need (for 2 drinks):

  • 4 ounces tequila
  • 2 oz simple syrup infused with jalapeño
  • 1.5 oz fresh squeezed lime juice
  • 2 oz fresh squeezed grapefruit juice
  • 2 oz organic grapefruit shrub (I use Shrub & Co. that you can get at Binny’s or Amazon)
  • a rock glass with Tajin on the rims (you can also get Tajin at Amazon), don’t skip the Tajin!

Earlier in the day (or in the day(s) before) make your simple syrup.  What you’ll need for that:

  • 1 large jalapeño
  • 1 cup white sugar
  • 1 cup water

Slice the jalapeño into rings (keeping the ribs and seeds) and place in a saucepan with the water and sugar, bring to a boil.  Reduce the heat and stir until the mixture looks clear (maybe 5 minutes), set aside to cool until you can put into a container and place in the fridge. Don’t discard the jalapeño, put it in with the syrup too.

If you’re squeezing the grapefruit and lime yourself, do that earlier too and put that in containers in the fridge; it all keeps for a good week so make enough for your after work libations. Don’t discard the pulp, it makes the drink even better.

Now to make the drinks!

Wipe the rim of the glasses with a sliced lime and “turn” in the Tajin making sure it adheres all the way around the glass with maybe 1/8 inch depth (some people like more, some like less so know your audience), fill the glass with ice to just below the Tajin (see note).   Grab a cocktail shaker (or a cup with a tighter fitting lid) And fill it with ice to start compiling the ingredients.

[Note: I sometimes use one large ice cube but any type of ice works, the larger cube is better for outdoors since it is slow melting but that’s my only advice about the ice.]

Pour all ingredients (except the Tajin of course) into the shaker and place on the lid. If you like it a little spicier, muddle a jalapeño from the simple syrup in a little of the simple syrup and add that to the mixture then shake it like you’re trying to kill it!  This will break up the ice and help the flavors meld together and get really cold.

Using a cocktail strainer or anything to prevent any large solids from the mixture getting into the glass and pour into the glasses; top with a cayenne floater if you like it really spicy.  That’s it, enjoy and don’t drink and drive please!

FFC4E9A3-B2ED-4226-AE9A-83F7D9BF0217

What’s better than a chocolate chip cookie? A maple bacon chocolate chip cookie!!

I have a lot of tips about making cookies (and baking in general) so please check here for those tips and the original thin and crispy chocolate chip cookie recipe if you wish!

This recipe makes a lot of cookies, maybe around 60, so no need to double unless you want to freeze some of the dough.  I asked my 7th grade boyfriend (who uses this recipe) how many he would say it made and he said “A LOT. The last two times (out of 3x I’ve made them) I’ve thought to myself, “maybe I should double the recipe like I did that first time”. Cut to, I’m like 2/3 though the batter and I’m like, “note to self, there is no need to EVER double this recipe.”

Getting right down to it, you can throw candied bacon in just about any recipe and make it better but I think the foundation of the cookie is really important, you can’t just put lipstick on a pig right?  I use my thin and crispy chocolate chip cookie recipe (with small variations) to make these perfect little crisps of goodness because the texture of the center of the cookie plays very nicely with the crunch of the bacon.

Disclaimer: I love bacon so the amount I use may be too much for you but don’t change it, there’s never too much bacon…. 

That being said, let’s get started!

What you will need:

  • 1 lb bacon (or one package, see note)
  • ~2 tbsp maple syrup (Pure maple syrup please)
  • 2 2/3 cups flour
  • 1 tsp baking soda
  • 1/2 tsp salt
  • 2 sticks unsalted butter
  • 1 cup granulated sugar
  • 2/3 cup packed light brown sugar (muscovado if you can find it)
  • 1/4 cup light corn syrup
  • 2 large eggs
  • 2 tbsp whole milk
  • 1 1/2 tbsp vanilla extract (always use Madagascar vanilla if you can please)
  • 1/2 cup walnuts
  • 1 4 oz. block of Baker’s German chocolate (or any variety you prefer as long as it isn’t milk chocolate)
  • 1 cup of semi sweet chocolate chips

[Note: I’m all for being healthy if you can but I just believe nitrates make bacon taste better so I buy Oscar Mayer or Smithfield bacon for these cookies or for any reason I am “candying” the bacon. More economical brands of bacon have a lot of fat which does not work well here, get the good stuff.] 

Take out the butter and eggs because you want them both at room temperature (at least 30 minutes, 1 hour is better).

Chop your bacon into bits by slicing ~every 1/2 inch along a slice of bacon, don’t separate the pieces, cut through the entire stack at once.  I just remove it from the package, lay it on a cutting board and slice through the whole thing at once.

Place all of the bacon in a non-stick, larger frying pan and cook until all of the fat is rendered and the bacon is crispy but not too crispy making sure to separate the pieces as you cook.  Some larger pieces are good but not a lot.

Remove the bacon to drain on paper towels and wash the pan (save the rendering for macaroni and cheese or potatoes or bread or whatever, that stuff is like umami gold). Now this is important so be super diligent here: move the bacon to clean paper towels and remove as much of the rendering from the pieces as you can and place back into the clean pan and turn the heat to medium.

Pour the maple syrup into the pan with the bacon (I say ~2 tbsp but I never measure, just pour enough into the pan so the bacon will be coated with just a little extra in the pan) and cook until there is almost no syrup left in the pan (as it reduces over the heat, it becomes harder and sweeter).  

Remove the bacon to a plate or pan lined with parchment paper (do NOT use wax paper, that’s an accident waiting to happen) and make sure you spread it out where the pieces aren’t really touching. Some can touch, don’t go nuts trying to make it perfect because sometimes I just dump it all on the plate then chop it later. Save yourself a step.

You will want this to cool until it no longer feels sticky, the time varies based on humidity and the amount of syrup you used; if I’m being honest, if you use too much it will never dry so be very careful. Too little is never a problem so err on that side please. Once it has cooled to your satisfaction….

Set the oven to 350, you will need it for the walnuts.

Chop the walnuts finely, you want them to add texture but not jump out at you like “oh, there’s a chunk of walnut”. Put the walnuts on a sheet pan (or whatever kind of vessel you choose) and put in the oven for maybe 7 minutes (you don’t want to over toast, just want to warm up the oils a bit), remove them and let them cool. The oven doesn’t have to reach full temp for you to place the nuts in it, I do not toast them a lot so a lower temp will be fine.

Let them cool before you put in the batter.

In a large bowl, mix together butter, sugars and corn syrup. Add eggs, milk and vanilla and mix thoroughly. Mix together the dry ingredients and add to the bowl, don’t mix yet.

Now you want to prep the chocolate. I “shave” the chocolate with a knife by slicing really thin along the short side of the block and it will just “splinter” off, you don’t want any really large chunks; the goal is to have the chocolate melt into the cookie. After I finish “shaving” the block, I run the knife across the other way to cut any longer “strips” into smaller pieces. The smaller and thinner the pieces, the more chocolate through every bite.

Now you can place the cooled nuts, bacon and chocolate (shaved and chips) into the bowl with the rest of the ingredients. You don’t want to mix too much and I recommend you mix this with a rubber spatula or spoon so as not to over mix (which is a disaster when talking about cookies). Use your best judgement but please stop mixing when you no longer see flour.

If you can, avoid using a dark pan as it could cause these cookies to burn on the bottom. I use a silver(ish) pan with Reynolds Non-Stick Aluminum Foil but parchment paper is good also. If it is a good non-stick pan, just put the cookies on the pan but please try the pre-bake first (outlined in the bullets in the link at the beginning if you don’t know if your oven temp is precise). You don’t want to ruin an entire batch.

I use a cookie scoop but you can use a regular spoon to scoop the dough, just make sure they are all about the same size for consistency in cooking. You do not have to roll these around because the heat from your hands could affect the texture of the candied bacon, just dump the ball onto the sheet from the scoop/spoon. Sprinkle each cookie with the sea salt and bake for about 12 minutes, I turn the cookie sheet halfway through for consistency but I am obsessive so you don’t have to do that if you don’t think you need to.

The cookies will look a little underdone but that’s okay, they will firm up as expected. If you follow the advice about testing one cookie, you will just follow what you learned there.

As I mentioned in my other cookie recipe, there are so many things you can add but please consider adding whatever you like, it is your food so make it your own! 57A19A67-D707-49EA-87A0-91E10DB6173B

Move over tortilla scoops, there’s a new kid in town: Naan!

So, it’s true that Indian foods tastes so much better with Naan and you really don’t need any utensils if you’re doing it right so, wash your hands and grab that Naan because it’s an experience!

What is Naan you ask? Really it’s just pita bread with egg but technically it is a leavened, oven-baked flatbread found in the cuisines mainly of Western Asia, South Asia, Indonesia, Myanmar and the Caribbean  but I don’t bake it, I grill it!

You will find so many variations of a recipe for Naan, some of which calls for yogurt or ghee but I’m boiling it down to what I did to get delicious hot Naan in the quickest and simplest way possible; you know me, get it done!

First it’s going to take a little bit of waiting time but not a lot, hands on you’re about 15 minutes invested and waiting time is about 1.5 hours.  Let’s get started!

What you’ll need:

  • 1 package (.26 ounce) of active dry yeast (no substitutes!)
  • 1 cup white sugar
  • 1 cup warm water (more on this in a minute)
  • 3 tbsp milk (I use whole milk but maybe that’s my hangup but it works)
  • 1 egg, beaten
  • 2 tsp salt (I use Morton’s coarse sea salt)
  • 1/2 tsp baking soda
  • 4 cups bread flour (see note)
  • Garlic powder
  • Garlic (roasted, diced, chopped, whichever you prefer)

[Note: bread flour has a higher protein content and it really does produce a better bread but it won’t ruin your dish if you use all purpose.  If you have to use all purpose flour, I highly recommend using a good quality one like Kimg Arthur]

Now for the most important part: proofing the yeast.  It’s always best to activate your yeast before you start the recipe because it “kick starts” the rising process. You proof your yeast by mixing the yeast, 1 tbsp sugar and the warm water; you want the water to be between 110 and 115.  I do not go much higher than 110 however, you can kill the yeast so keep it low but not lower than 110.

The hot water in my kitchen is about 122 degrees so I measure out the water early in the process to allow it to cool to 110 before I need to use it.

[Note: I know, I know “warm” isn’t helpful.  It isn’t which is why you need a thermometer  I have a really good one I bought on Amazon for like $19.99 and it’s good for so many things.  Here’s a link to an article about it, if you do t have one please get it quick.]

You should proof the yeast in the bowl in which you will be using for the dough because it “grows”, you’ll want it to sit for ~10 minutes until it increases in size and looks “frothy”.

Now, once it is frothy, add the remaining sugar to the bowl and, in a separate bowl, beat the egg with the milk, salt and baking soda and pour into the bowl with the yeast mixture and sugar.  Adding the flour can be a little tricky because you don’t want to add too much, I start with 3 1/2 cups and mix to determine the consistency  if you need to add more flour, do it gradually.

I season by smell so I dump some garlic powder in the mix now to add additional flavor, just enough so you can smell it when you start mixing it together.  I would guess maybe 1 tbsp? It’s your food, add as much or as little as you like.

You want the dough to come together nicely, incorporating the flour without “cracking” which you’ll know what that is when you see it; it will literally look like you added too much flour. You don’t want it to stick to your hands either so just be gradual.  The kneading at this point helps, dump some flour on the counter and place the dough there, begin to knead the dough for ~7 minutes.

You will want the dough to feel “smooth” after kneading.  You don’t want “cracks” which is very dry patches of dough, maybe I’m over complicating but just please don’t add too much flour, adding it while you knead is best. Place the dough in an oiled bowl (I wipe the inside of a bowl with olive oil using a paper towel) and “roll” the ball around in the bowl to coat all sides.  Soak a dish towel in warm water from the faucet and wring out well, place over the top of the bowl and let rise in the warmest place in your kitchen for 1 hour, it should double in size.

I take a photo of the dough and compare after an hour to make sure it’s rising. If you find it is not rising, just move it to a warmer place and give it another 30.  You can allow it to rise overnight in the fridge too but I don’t ever do that.

After 1 hour (or whenever you are satisfied with the rise) uncover the dough and pull of bits of dough that measure about the size of a golf ball.  If I’m being perfectly honest, mine are all different sizes so you don’t have to stress too much about it.  Roll the dough into a smooth ball and place on a plate/platter to hold all of the dough balls. Cover them with a dry cotton towel and let the rest and rise again for 30 minutes; they should double in size again.  Now start the grill on high heat (see note).

[Note: you can use a cast iron pan or heavy frying pan also, just make sure it is hot.]

After the 2nd rise, you’ll want to shape the dough.  Take each ball and pull out to a Naan shape (well any shape really, just don’t tear the dough or make it too thin}. Mine are varying sizes, shapes and thickness so you cannot really go wrong here. If you do year it, just pinch it back together.

The dough will really stick to itself here so be careful how you place the shaped dough, I lay out a sheet of wax paper and place it there. Shape all of the dough and melt 1/2 stick of butter in a pan with the garlic (I don’t have a microwave but I suppose you could use that if you want). Brush the tops of the dough with the butter and place the butter side down on the hot grill or pan (whichever you are using) but be careful not to overcook!

You will cook them no longer than 2 minutes per side (3 max).  Before you turn them, brush the top side with the butter, turn and cook for the same time on that side.  That’s it!

As I always say: it’s your food so make it your own! Once you get the hang of it, try adding new fun flavors!  Enjoy and please let me know what you think…..

3DC83860-BC5C-411F-B739-A63ED1028C51


When life quarantines you with lemons, you make glazed lemon cookies right?

Disclaimer: I love anything lemon. The smell, the look, the flavor, all of it. But….. there is a distinct difference in the real lemon zest, just squeezed juice and the fake crap you buy in a bottle. Don’t be fooled, nothing is as good (or even comes close) to actual lemon and lemon juice. Don’t sabotage yourself or your food by falling for the lie, it is all crap…..

These lemon cookies are not too sweet and not too lemony, I think they are pretty close to perfection just as they are. I know I am always preaching “make it your own” but I don’t know many variations that would improve upon this particular cookie and, if you find some, please do let me know! HEre is what you will need:

  • 1 cup butter, softened
  • 2 cups granulated sugar
  • 1 tsp vanilla extract
  • 2 eggs
  •  Zest of 3 large lemons (see note)
  • 3-4 tbsp fresh lemon juice
  • 1/2  tsp salt
  • 1/2 tsp baking powder
  • 1/4 tsp baking soda
  • 3 cups all-purpose flour
  • 2 cups powdered sugar (if you do not have powdered sugar, just put regular sugar in a food processor and grind the crap out of it)

[Note: be very careful when zesting the lemon. There is an under layer on the lemon that is called the “pith” and it is very bitter, this is the white layer you see when you begin to zest. One quick pass with the micro plane or zester will do the trick, don’t go over the same spot twice. Zest 2 for the first part of the recipe (the batter) and save one to zest for the glaze]

Place butter, sugar, vanilla, eggs, lemon juice and zest of two lemons in a bowl; cream together until light and fluffy. Dump the remaining ingredients in the bowl (Except for the remaining zest and powdered sugar) and mix until just blended. Remember you never want to over beat your cookie batter, it is a gluten thing that makes them tough. This is a very tender cookie which is part of its charm….

Place one cup of powdered sugar in a bowl or rimmed plate. Using a small cookie scoop (or a larger kitchen spoon, not the big plastic ones but the larger of the two spoons you have with which to eat), scoop out enough dough to fill the scoop/spoon with a little “mound” on the top. Roll the dough into a nice ball and drop in the powdered sugar. I grab the ball again and roll it around in my hand so the sugar coats the whole cookie. Don’t use two hands and roll together, just kind of roll it around with the one hand, the sugar will then just coat the whole cookie.

Place on a cookie sheet with parchment (or Reynolds non-stick aluminum foil) and bake at 350 for ~10 minutes; don’t forget to wait for 10 minutes after your oven indicates it is preheated to start baking (this is a good tip for anything you put in the oven).

Make a glaze while the cookies are baking.  Put one cup of powdered sugar in a bowl with the zest and enough lemon juice to make a glaze, this is a heard thing to measure the amount in which you will need but just add a little, stir, add a little more until it feels like the right consistence. You do not want it to be too loose nor too thick, I brush it on if that helps determine the consistency you are looking for. 

Let the cookies cool for maybe 15 minutes and brush with the glaze, it will need to “dry” for maybe 5 minutes. Test one cookie with the glaze to adjust the consistency as you see fit. Oh and, also, I often have either too much or too little glaze, it is a mystery to me how to know exactly how much to use so plan on making more or throwing out some; I am, after all, not an expert.  

Enjoy, I hope they are as good to you as they were to me!

Thin and Crispy Chocolate Chip Cookies v2

These cookies are almost perfection. I say almost because I am always looking to make things better. As in my other cookie recipe, following are some important tips for cookie baking:

  • If the recipe doesn’t indicate specifically the type of flour, look for baking powder or baking soda. If the recipe lists that as an ingredient, use All Purpose Flour (AP) and if it doesn’t, look for another recipe because nothing good comes out of self-rising flour.
  • When measuring your flour, never just “scoop” the flour directly into the measuring cup as this causes “packing” which can result in a tougher that necessary bread or cookie. You should use a spoon to put the proper amount into the measuring cup or stir the flour really well before you scoop it out with the measuring cup.
  • If the recipe calls for “extra large” eggs, I always beat one extra egg and add half. If the recipe is a detailed to indicate the size eggs to use, don’t alter anything until you try it first, this is a seriously thought out process so don’t discount that value.
  • You don’t ever need to add the eggs “one at a time”, just make sure you beat them really well. Generally you are adding the eggs to other wet ingredients so you can’t hurt the batter; if it tells you to add the eggs to dry ingredients for a cookie, move on and don’t make those bricks.
  • Vanilla is a beautiful addition to any baked good, feel free to be liberal when adding this but never add less. Never.
  • Baking power and baking soda are NOT the same thing. Please don’t ever make that mistake.
  • Never use salted butter (in anything except that beautiful gold brick of goodness called Kerrygold to slather on toast). You want to control the amount of salt in all dishes.
  • Take that round paper can of Morton Salt and use it to put out fires only, use the box of Morton Kosher Salt when including in recipes. Maldon Sea Salt Flakes are simply perfection when sprinkling on cookies or fudge (okay or anything really). Trust me…..
  • It is almost always a good idea to chill dough before you bake cookies, peanut butter, sugar, and chocolate chip cookies benefit the most from this unless you are looking for a really flat crispy cookie (like this one). Do not let this one rest please.
  • You cannot turn a simple sugar cookie recipe into a “cut out cookie” recipe, it will not hold up.
  • You can add nuts, candies, toffee, oats, etc. to any cookie recipe, just don’t overdo it. Always remember to toast your nuts please, you will thank me later.
  • Invest in either vanilla beans or Madagascar vanilla, it makes all of the difference. If you are going to use that “imitation vanilla extract” crap, just buy Chips Ahoy in the package. The beans aren’t necessary and maybe not worth the effort unless you are making ice cream so go with the Madagascar variety if you can, you can get a giant bottle at Costco. If you can’t find that type, get the real vanilla extract please.
  • You can make the “balls” and freeze them then bake one (or 5) at a time. Just put them on a pan in the freezer so they don’t touch until they are frozen solid then move to a more space friendly container. Bake an additional 3-5 minutes depending on your oven. Just watch them for doneness and make note for future baking.
  • When trying a new recipe, I always bake one cookie at the temp and time suggested; let it rest for 7 minutes then decide if I need to adjust. If you do it once, you can use that barometer for all future baking efforts.

Okay now, on to the cookies! What you will need:

  • 2 2/3 cups flour
  • 1 tsp baking soda
  • 1/2 tsp salt
  • 2 sticks unsalted butter
  • 1 cup granulated sugar
  • 2/3 cup packed light brown sugar (muscovado if you can find it)
  • 1/4 cup light corn syrup
  • 2 large eggs
  • 2 tbsp whole milk
  • 1 1/2 tbsp vanilla extract (I use 1 tbsp of vanilla and 1/2 of almond extract but you can use all vanilla)
  • 1 cup walnuts
  • 2 blocks of chocolate (any variety you prefer as long as it isn’t milk chocolate)

Set the oven to 350, you will need it for the walnuts. Melt the butter and set aside to cool.

Chop the walnuts finely, you want them to add texture but not jump out at you like “oh, there’s a chunk of walnut”. Put the walnuts on a sheet pan (or whatever kind) and put in the oven for maybe 7 minutes (you don’t want to over toast, just want to warm up the oils a bit). Remove them a let them cool. The oven doesn’t have to reach full temp for you to place the nuts in it, I do not toast them a lot so a lower temp will be fine. Let them cool before you put in the batter.

In a large bowl, mix together butter, sugars and corn syrup. Add eggs, milk and vanilla and mix thoroughly. Mix together the dry ingredients and add to the bowl, don’t mix yet.

Now you want to prep the chocolate. I “shave” the chocolate with a knife by slicing really thin along the short side of the block and it will just “splinter” off, you don’t want any large chunks; the goal is to have the chocolate melt into the cookie. After I finish “shaving” the block, I run the knife across the other way to cut any longer “strips” into smaller pieces. The smaller and thinner the pieces, the more chocolate through every bite.

Now you can place the cooled nuts and chocolate into the bowl with the rest of the ingredients. You don’t want to mix too much and I recommend you mix this with a rubber spatula or spoon so as not to over mix (which is a disaster when talking about cookies). Use your best judgement but please stop mixing when you no longer see flour.

If you can, avoid using a dark pan as it could cause these cookies to burn on the bottom. I use a silver(ish) pan with Reynolds Non-Stick Aluminum Foil but parchment paper is good also. If it is a good non-stick pan, just put the cookies on the pan but please try the pre-bake first (outlined in the bullets above). You don’t want to ruin an entire batch.

I use a cookie scoop but you can use a regular spoon to scoop the dough, just make sure they are all about the same size for consistency in cooking. They should be about the size of a rounded tablespoon of dough, roll them a small amount in your hands to compact the dough; don’t press hard, just lightly to get the majorly jagged edges. Sprinkle each cookie with the sea salt and bake for about 12 minutes, I turn the cookie sheet halfway through for consistency but I am a freak so you don’t have to do that if you don’t think you need to.

The cookies will look a little underdone but that’s okay, they will firm up as expected. If you follow the bullet above about testing one cookie, you will just follow what you learned there.

As I mentioned in my other cookie recipe (and above), there are so many things you can add but please consider adding whatever you like, it is your food so make it your own!

116ca34f-6338-4fb2-9e7d-b94fe76a53f0

Pecan Rolls – deliciously simple and simply delicious

If you are like me, you have been leery of recipes that require a specific temperature for the yeast and several iterations of kneading. This recipe is quite easy as it relates to an actual dough. Read through the recipe and see what you think, it really was pretty simple. If you are going to make them, be sure do make the dough the night/day before as it really needs to sit about 12 hours before you bake them; there is a short ~30 minute rise again before you bake them.

Oh and you can use this dough for cinnamon rolls too! It’s your food, make it your own…

I didn’t use the scale for this recipe and it turned out great so you can use simple measuring cups for this. Here is what you will need:

For the dough

  • 7 cups flour (don’t scoop out 7 straight away, you’ll use it in “parts”)
  • 1/2 ounce yeast (2 packages or 4.5 tsp)
  • 2 cups milk (I recommend whole milk)
  • 1/2 cup warm water (just use tap water at the hottest setting and let it cool to the point where you can just put your finger in it, shouldn’t be too hot)
  • 1/3 cup sugar
  • 1/3 cup oil (I used canola)
  • 1 egg (beaten)
  • 1 tbsp baking powder
  • 1 tsp salt

For the caramel in the pan:

  • 1 cup brown sugar (packed)
  • 1/2 cup butter
  • 1/2 tsp salt
  • 2 tbsp light corn syrup
  • 1/2 cup chopped pecans (toasted if you have time)

For the filling:

  • 1/2 cup butter (softened)
  • 1/2 tsp salt
  • 1 tsp vanilla
  • 1/2 cup sugar
  • 1/4 cup cinnamon
  • 1/4 cup chopped pecans

Okay so let’s start with the milk, you’ll need to heat it to a luke warm temperature, I did this by putting it in a small saucepan and setting the heat to medium-low; I did this before I started anything.

While the milk is warming, I place the yeast in a bowl and poured the warm water over the yeast and let it sit. I didn’t stir or disturb it in any way, just poured over and let it sit for ~10 minutes. You want it to look “creamy” before you use it. It should look kind of like this:

Now start on the dough, place 4 cups flour, egg, oil, sugar, baking powder and salt into a bowl; I beat the egg with the oil to make sure it is fully incorporated. Test the milk, should feel just warm (not hot), put milk and yeast mixture in the bowl then stir to combine. I find it best to use a wooden spoon but I am not sure how important that is but it is what I always do. Continue to add the remaining flour, by cup, until completed. I didn’t use the full cup from 6-7 becuase the dough looked as thought it was good. Use your judgement on the last cup, start with 1/2 cup and stop when you think it is not absorbing any more liquid. After adding cup 6, I started using my hands to really incorporate the flour. Dust some flour on the counter and dump the dough.

Knead the dougn until it is a little smooth on the surface and elastically. The best method i found is to “push” the dough away from you with the bottom of your hand. Fold the dough over itself from side to side and continue to push away from you and downward; I did this for maybe 5 minutes. Rinse out the bowl you used to mix the dough and then coat it with oil (I used canola oil becuase it is virtually flavorless, I wouldn’t use olive oil here since it is a sweet dish).

Place the dough in the bowl and turn it a couple of times to coat the ball of dough and cover with a damp towel. I soaked a kitchen towel with hot water and wrung (wringed?) the water out and covered the bowl then set it in a warm place in the kitchen for an hour to rise. I was skeptical about the serving size when I covered it becuase it was prety small (I didn’t take a photo because my hands were covered with schmutz) but when I uncovered the bowl….. I saw this:

Now I think you should do something else for ~30 minutes, you don’t want to make the filling too early.

To make the filling, place 1/2 cup of butter (1 stick) in a smaller saucepan and turn the heat to medium-low. Let me butter begin to melt and add in the brown sugar and pecans, stir until it is fully melted then remove from heat and add the corn syrup, salt and vanilla. Line 3 smaller pans with wax or parchment paper for easier cleanup, I used 2 9“ cake pans and 1 9” square pan but you can use 2 9×13” baking dishes [see note]. Place the caramel mixture into the prepared pans. And now on to rolling out the dough.

Note: you can freeze them at this point, quick a quick flash freeze on a baking sheet until they are firm then place them in your desired vessel.

Place the dough on a floured surface and start rolling out to a shape that resembles a large rectangle, you don’t have to be too finicky about this but the more square the dough, the better the “roll”. It shouldn’t be too thin, here is what mine looked like to make 28 rolls (10 each Round pan and with in the square pan). I made it more square as I began to roll it up onto itself. You will want enough surface area to accommodate the filling and enough of a rectangle for the “ends” to meet when you complete the roll. You most certainly can adjust the shape as you roll the dough by stretching the edges to be more square as you roll; it was able to do it easily because the dough is pretty “elastic” at this phase. Just pull the dough to the shape you want as you roll.

Now you want to slather this dough with the room temp butter then mix the cinnamon, salt and sugar together and sprinkle the whole area with that and the pecans. Then you are ready to roll. You want to roll from the long side or else you will have Godzilla rolls which is fine with sushi but I think it would be a little much here…. Just roll and stretch until it is all completed then I grabbed both ends and stretched out a little more (gently) just to make sure there wasn’t large gaps in the roll. Then you want to start slicing the dough, I used a sharp large knife just make sure you don’t “saw” through it as this will seal the edges and prevent proper rising (like how you shouldn’t “twist” when cutting biscuits, same concept here). I sliced them maybe 1” thick and placed on top of the topping in the pans. I put them closer to the center so they would “grow outward” during the cooking process. They definitely grow as you cook them.

Cover the pans with aluminum foil and place in the refrigerator For about 12 hours but don’t leave them much longer than 18 hours. When you are ready to bake, remove the foil and place on the stovetop (somewhere warm) while the oven preheats (should be ~30 minutes) then bake for 30 at 350. They will look like this, the ones on the top look weird because they were the ends that weren’t even:

Let them sit for a minute and dump the entire pan onto a plate. Enjoy!!!

Pecan rolls fresh from the oven....

Sesame Miso Dressing

It is hard to believe something this good can be so easy. You may not have miso in your house now but, once you get it, you will find so many reasons to use it. Trust me….

I put this on grilled cabbage or a regular salad, altered it makes a great marinade also.

  • 1 1/2 tablespoons white miso paste
  • 2 tablespoons seasoned rice vinegar (you can use unseasoned if you have it)
  • 1 1/4 tablespoons honey
  • 1 tablespoon minced fresh ginger root
  • 1 tablespoon sesame oil
  • 1/2 lime, juiced
  • 1 clove of garlic, minced

Whisk miso paste into rice vinegar in a bowl until well combined. Stir honey, ginger, sesame oil, and lime juice into the vinegar mixture. Sprinkle on some sesame seeds if you’re so inclined.

You can add peanut butter for a pasta with chicken dressing, just add some crushed peanuts, chopped scallions and some julienned vegetables to al dente spaghetti and you’re golden.

This dressing has so many uses and potential variations. It is your food, make it your own!

Below is a meal I made with charred cabbage to use the dressing….