Pecan Rolls – deliciously simple and simply delicious

If you are like me, you have been leery of recipes that require a specific temperature for the yeast and several iterations of kneading. This recipe is quite easy as it relates to an actual dough. Read through the recipe and see what you think, it really was pretty simple. If you are going to make them, be sure do make the dough the night/day before as it really needs to sit about 12 hours before you bake them; there is a short ~30 minute rise again before you bake them.

Oh and you can use this dough for cinnamon rolls too! It’s your food, make it your own…

I didn’t use the scale for this recipe and it turned out great so you can use simple measuring cups for this. Here is what you will need:

For the dough

  • 7 cups flour (don’t scoop out 7 straight away, you’ll use it in “parts”)
  • 1/2 ounce yeast (2 packages or 4.5 tsp)
  • 2 cups milk (I recommend whole milk)
  • 1/2 cup warm water (just use tap water at the hottest setting and let it cool to the point where you can just put your finger in it, shouldn’t be too hot)
  • 1/3 cup sugar
  • 1/3 cup oil (I used canola)
  • 1 egg (beaten)
  • 1 tbsp baking powder
  • 1 tsp salt

For the caramel in the pan:

  • 1 cup brown sugar (packed)
  • 1/2 cup butter
  • 1/2 tsp salt
  • 2 tbsp light corn syrup
  • 1/2 cup chopped pecans (toasted if you have time)

For the filling:

  • 1/2 cup butter (softened)
  • 1/2 tsp salt
  • 1 tsp vanilla
  • 1/2 cup sugar
  • 1/4 cup cinnamon
  • 1/4 cup chopped pecans

Okay so let’s start with the milk, you’ll need to heat it to a luke warm temperature, I did this by putting it in a small saucepan and setting the heat to medium-low; I did this before I started anything.

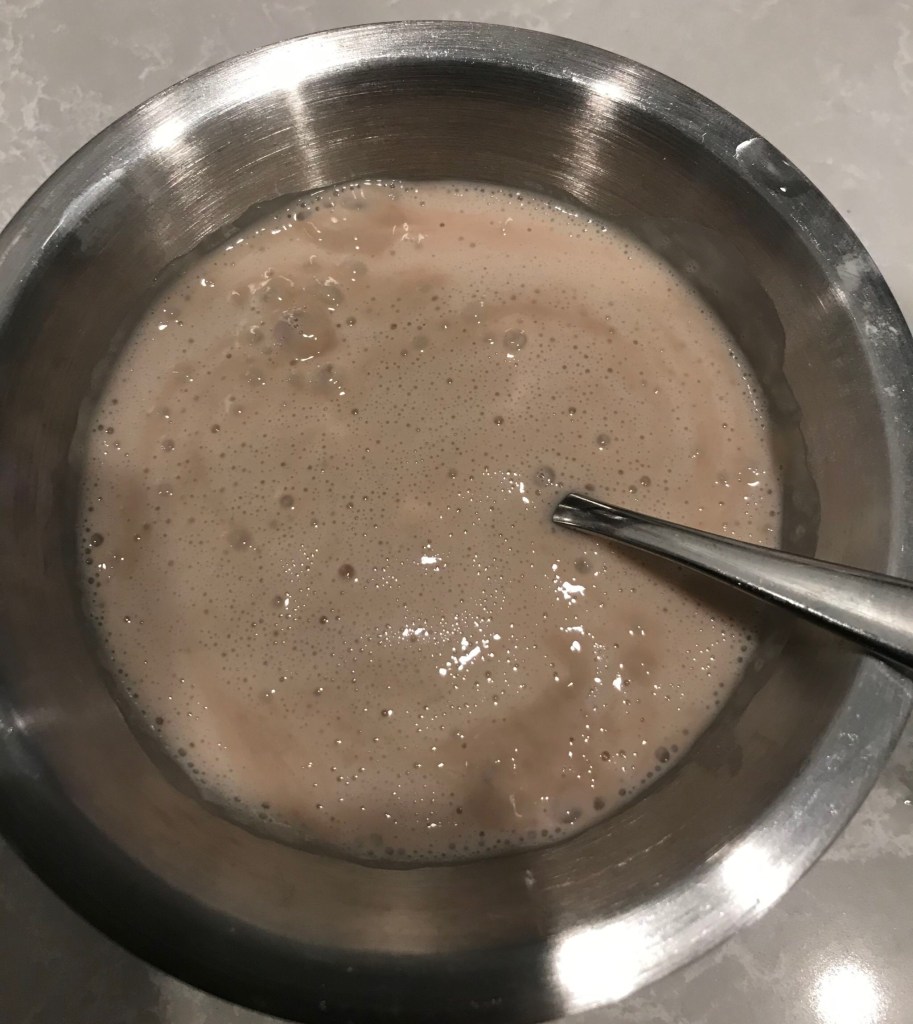
While the milk is warming, I place the yeast in a bowl and poured the warm water over the yeast and let it sit. I didn’t stir or disturb it in any way, just poured over and let it sit for ~10 minutes. You want it to look “creamy” before you use it. It should look kind of like this:

Now start on the dough, place 4 cups flour, egg, oil, sugar, baking powder and salt into a bowl; I beat the egg with the oil to make sure it is fully incorporated. Test the milk, should feel just warm (not hot), put milk and yeast mixture in the bowl then stir to combine. I find it best to use a wooden spoon but I am not sure how important that is but it is what I always do. Continue to add the remaining flour, by cup, until completed. I didn’t use the full cup from 6-7 becuase the dough looked as thought it was good. Use your judgement on the last cup, start with 1/2 cup and stop when you think it is not absorbing any more liquid. After adding cup 6, I started using my hands to really incorporate the flour. Dust some flour on the counter and dump the dough.

Knead the dougn until it is a little smooth on the surface and elastically. The best method i found is to “push” the dough away from you with the bottom of your hand. Fold the dough over itself from side to side and continue to push away from you and downward; I did this for maybe 5 minutes. Rinse out the bowl you used to mix the dough and then coat it with oil (I used canola oil becuase it is virtually flavorless, I wouldn’t use olive oil here since it is a sweet dish).

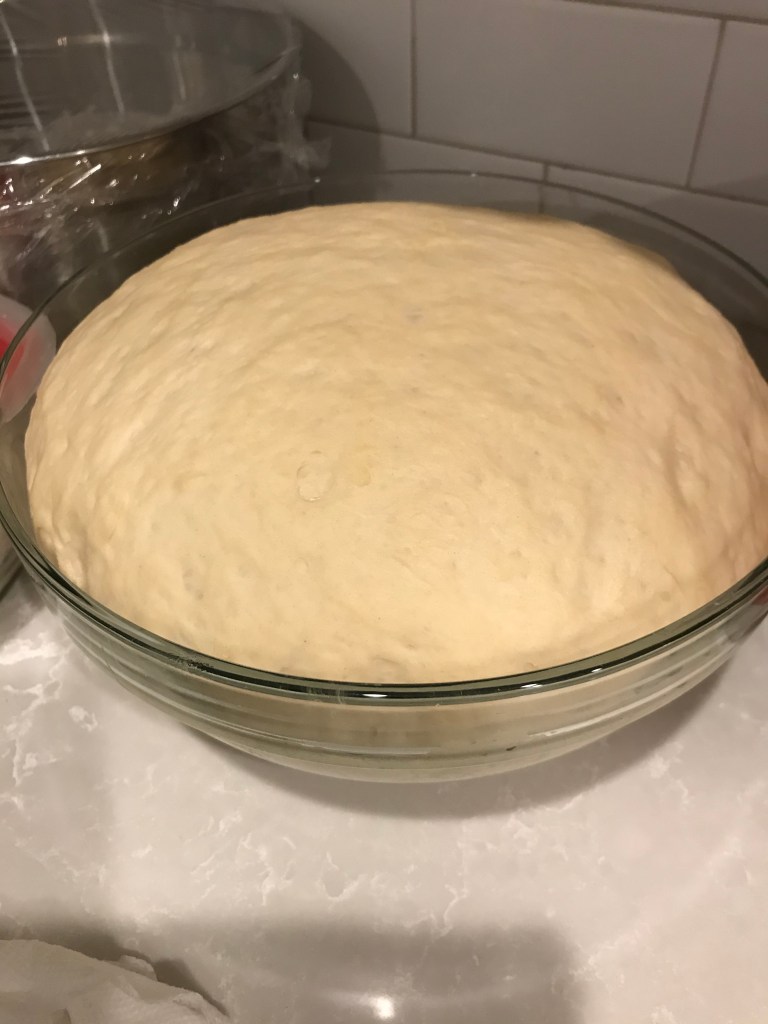
Place the dough in the bowl and turn it a couple of times to coat the ball of dough and cover with a damp towel. I soaked a kitchen towel with hot water and wrung (wringed?) the water out and covered the bowl then set it in a warm place in the kitchen for an hour to rise. I was skeptical about the serving size when I covered it becuase it was prety small (I didn’t take a photo because my hands were covered with schmutz) but when I uncovered the bowl….. I saw this:

Now I think you should do something else for ~30 minutes, you don’t want to make the filling too early.

To make the filling, place 1/2 cup of butter (1 stick) in a smaller saucepan and turn the heat to medium-low. Let me butter begin to melt and add in the brown sugar and pecans, stir until it is fully melted then remove from heat and add the corn syrup, salt and vanilla. Line 3 smaller pans with wax or parchment paper for easier cleanup, I used 2 9“ cake pans and 1 9” square pan but you can use 2 9×13” baking dishes [see note]. Place the caramel mixture into the prepared pans. And now on to rolling out the dough.

Note: you can freeze them at this point, quick a quick flash freeze on a baking sheet until they are firm then place them in your desired vessel.

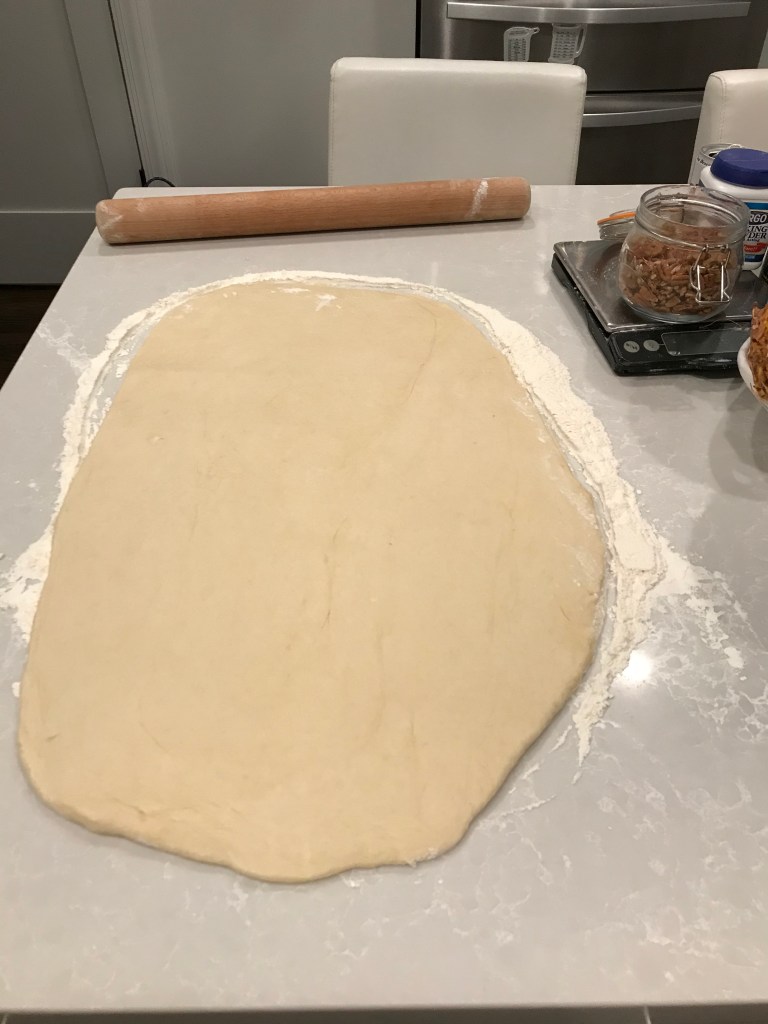
Place the dough on a floured surface and start rolling out to a shape that resembles a large rectangle, you don’t have to be too finicky about this but the more square the dough, the better the “roll”. It shouldn’t be too thin, here is what mine looked like to make 28 rolls (10 each Round pan and with in the square pan). I made it more square as I began to roll it up onto itself. You will want enough surface area to accommodate the filling and enough of a rectangle for the “ends” to meet when you complete the roll. You most certainly can adjust the shape as you roll the dough by stretching the edges to be more square as you roll; it was able to do it easily because the dough is pretty “elastic” at this phase. Just pull the dough to the shape you want as you roll.

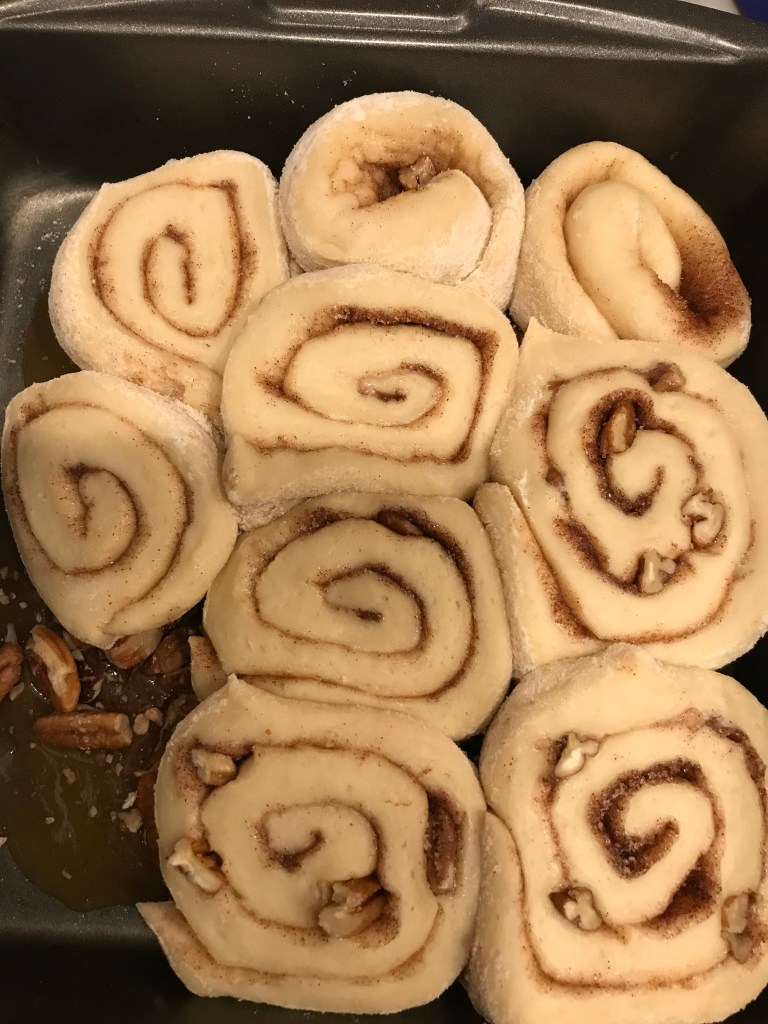
Now you want to slather this dough with the room temp butter then mix the cinnamon, salt and sugar together and sprinkle the whole area with that and the pecans. Then you are ready to roll. You want to roll from the long side or else you will have Godzilla rolls which is fine with sushi but I think it would be a little much here…. Just roll and stretch until it is all completed then I grabbed both ends and stretched out a little more (gently) just to make sure there wasn’t large gaps in the roll. Then you want to start slicing the dough, I used a sharp large knife just make sure you don’t “saw” through it as this will seal the edges and prevent proper rising (like how you shouldn’t “twist” when cutting biscuits, same concept here). I sliced them maybe 1” thick and placed on top of the topping in the pans. I put them closer to the center so they would “grow outward” during the cooking process. They definitely grow as you cook them.

Cover the pans with aluminum foil and place in the refrigerator For about 12 hours but don’t leave them much longer than 18 hours. When you are ready to bake, remove the foil and place on the stovetop (somewhere warm) while the oven preheats (should be ~30 minutes) then bake for 30 at 350. They will look like this, the ones on the top look weird because they were the ends that weren’t even:

Let them sit for a minute and dump the entire pan onto a plate. Enjoy!!!

Pecan rolls fresh from the oven....

Sesame Miso Dressing

It is hard to believe something this good can be so easy. You may not have miso in your house now but, once you get it, you will find so many reasons to use it. Trust me….

I put this on grilled cabbage or a regular salad, altered it makes a great marinade also.

  • 1 1/2 tablespoons white miso paste
  • 2 tablespoons seasoned rice vinegar (you can use unseasoned if you have it)
  • 1 1/4 tablespoons honey
  • 1 tablespoon minced fresh ginger root
  • 1 tablespoon sesame oil
  • 1/2 lime, juiced
  • 1 clove of garlic, minced

Whisk miso paste into rice vinegar in a bowl until well combined. Stir honey, ginger, sesame oil, and lime juice into the vinegar mixture. Sprinkle on some sesame seeds if you’re so inclined.

You can add peanut butter for a pasta with chicken dressing, just add some crushed peanuts, chopped scallions and some julienned vegetables to al dente spaghetti and you’re golden.

This dressing has so many uses and potential variations. It is your food, make it your own!

Below is a meal I made with charred cabbage to use the dressing….

Melt in your Mouth Meatballs

Okay so let’s talk meatballs, they are delicious and a little polarizing if I am being honest; seems like everyone likes them prepared in a different way.

First is size, some think size matters but I don’t necessarily think that is important unless you consider for what purpose you are using them. Generally speaking, smaller meatballs are good for soups and I think that’s about it. The medium sized ones are good for appetizers, sandwiches and pasta dishes. The larger ones, I believe, are good for side dishes only. Seriously, what else could you use a larger meatball for? Seriously, I am asking…..

I used the medium sized meatballs for this dish because I was serving with gnocchi and crusty garlic bread. There are many tricks to a good meatball:

  • binding agent – what you use to “bind” the mixturerest – letting the ball
  • cheese – isn’t cheese important in all regards?
  • size of ingredients – consistency is key
  • meat used – this is a big one, what to use….
  • a compact ball – really ensuring the mixture is combined well and there are no “pockets”
  • rest after you have formed it
  • pre-cook method – this one is pretty polarizing on its own

The binding agent is really the most important part, there are so many options but I found the best one to be panko bread crumbs. You can use really anything that is “bread like” such as crackers, potato chips or bread but my best experience has been with the panko, more about how they are used in the recipe below.

The cheese you use, to me, is negligible. I like to use pecorino romano if I have it but I won’t die if I have to use Parmesan, use what ever you have really as long as it is a hard cheese. No food wasted right?

I guess size does matter because this is the second time I am mentioning it. You need to make sure all components of the ingredients are small; this applies specifically to the onion. There is nothing worse than a meatball with giant chunks of onion, my last batch had some larger pieces I wasn’t happy with but it didn’t ruin them. The larger pieces also create “cracks” that will break the ball apart when you cook them.

A compact ball is achieved by really mixing the mixture together before you add the meat and mixing with your hands; any other implement could lead to an inadequately mixed composition. I mean, you could use anything you like but it is my recommendation you use your hands because that gives you the best result.

Forming the balls is part of the “comparing” process. I use a large ice scream scoop with one of those handle things that “pushes” the ice cream out to scoop the mixture. I scoop out an amount that fills the scoop itself without a significant amount meaning over the top, you can use the handle thing to sweep the mixture out of just hit it on the bottom part of your hand to force it from the scoop.

Next you just press the mixture together with your hands compacting it as much as possible. I toss the meatballs between my hands pretty aggressively to help compact them then rolls them in my palms To form a perfect “ball”. You will notice if there are crack and you can just continue to compact them. A bowl of water helps if you dip your hands in it before working each meatball.

Rest is super important, you really need to give them a time out in the fridge before you cook them. This helps the flavors meld and the “ball” to stay intact when you cook it.

The meat is use is also heavily debated and I am a firm believer that it really doesn’t make that much difference if you use good quality meat [see note]. Some people will tell you using pork, beef and veal is the key but I don’t necessarily agree with that because it is up to your preference. For me, using different meats makes it more difficult to get a nicely compacted meatball because of the different textures. I use just ground beef a lot, it is just my preference but use what you have.

Note: whichever combination of meat you choose, be conscious of the fat content of the meat. A fattier ground beef will result in a potentially disastrous result looking like a bolognese because the meatballs could disintegrate, look for a lesser fat content when making meatballs, I use 96%.

Pre-cooking method is another hot topic for sure: some say fry them and some say bake them. They are very aggressive in their opinions about this. For me, I bake them for less mess and, if you turn them often while baking, you can get an “all around brown” if appearance matters to you. That’s really my only opinion on it.

Now let’s get to the size discussion, regardless of the desired size, consistency is important. If you don’t make them all the same size, you will have a cooking disaster. You don’t need a scale or anything dramatic like that, just use your eyes and if the look to be consistent, you are okay.

I will include a simple tomato sauce with this recipe, I could write six blogs about the types of sauce to use but that’s for another day. What you will need for the meatballs and a simple ragu (makes ~13 medium sized meatballs):

  • 1 1/2 lbs ground beef (I used 96%, see note above)
  • 1 large onion, finely diced
  • 7 garlic cloves, minced
  • 1 tsp red pepper flakes
  • 1 3/4 cup panko bread crumbs
  • 1 cup pecorino Romano
  • 1 small chunk of pecorino Romano or a Parmesan rind
  • 1 large egg plus 1 yolk, beaten together
  • 1 28 oz can of tomatoes [see note]
  • 1 small can or jar of tomato puree (you can use tomato sauce if you can’t find tomato puree)
  • 1 tbsp Italian seasoning (or 1/2 each of basil and oregano)
  • olive oil

Note: I use whole peeled tomatoes, San Marzano, and blend them using an immersion blender but you can use crushed tomatoes if you like.

First you want to Cook the onions and garlic. Place 3 turns of olive oil (maybe 2 tbsp) into a non-stick pan, make it large enough that you can make the sauce and add the meatballs to finish, I use a Le Creuset 3 1/2 quart braiser but you can use a large sauté pan; a wide pan with lower sides is best.

Once the oil is heated, add the onions and cook for ~5 minutes then add the garlic and 1/2 of the red pepper flakes, garlic cooks quicker and tastes bitter when overcooked so be sure to let the onions cook a bit first; you will cook this mixture for ~2 more minutes. Add salt and pepper liberally. Turn off the heat and relocate ~1/2 of the mixture to a large bowl.

While that is cooling, measure out the panko and do it in at least a 2 cup measuring vessel so you can add the water to that. Put enough water in the container with the panko so the water just reaches the top of the panko, you can judge this by slowly adding water to the container and pressing with the pack of your hand on the panko and feeling the water (I used a little more than 3/4 of a cup but less than 1 cup). You don’t want to see the water but you want it to almost cover the panko. Let that sit for at least 5 minutes but you can let it sit for more if you like, you want the panko to absorb all of the water.

While that is sitting, grate the cheese and place in the bowl with the onions and garlic and add the egg and extra egg yolk plus 1 tbsp olive oil; add a dash of salt and pepper.

Now you want to address the panko which should have absorbed the water by now. With your hands, “mash” it together in the same container. If there is extra water (and it has been more than 5 minutes), add a little more panko and mix it together and if the crumbs are still “crusty”, add a little water and let it sit for 5 minutes more. It should look like a paste when you mix it all together. You don’t want extra water or to feel the “stiffness” of the panko, it should feel… You want it to look as close to this as possible.

It should look pretty close to this.

Now this is where you really use your hands, roll up your sleeves because it is about to get messy. You really need to mix this well so you don’t see “clumps” of meat or panko or onion, really dig in and mix with your fingers; don’t just use your whole hand. Once you feel is is combined enough, start forming (see notes above on forming), you should have about 13 medium sized meatballs that are now ready for a rest.

Now this is where you really use your hands, roll up your sleeves because it is about to get messy. You really need to mix this well so you don’t see “clumps” of meat or panko or onion, really dig in and mix with your fingers; don’t just use your whole hand. Once you feel is is combined enough, start forming (see notes above on forming), you should have about 13 medium sized meatballs that are now ready for a rest.

Place them on a foil lined baking sheet in the fridge for ~30 minutes (you can leave them overnight also if you like), don’t cover them. Pre-heat the oven to 475 (if you are baking as the pre-cook method which is what I do) once you put them in the fridge. After the 30 minutes, remove the meatballs from the fridge and place them in the oven for ~20 minutes on the center rack.

Note: to ensure the oven has actually reached the proper temperature, you should wait at least 10 minutes after the oven indicates it has reached the desired temp.

While the meatballs cook, reheat the onions and garlic remaining in the pan and add the tomatoes (both kinds), sugar, spices, remaining red pepper flakes and the rind or chunk of cheese; let it simmer while the meatballs cook.

When the meatballs are done, place them in the pot with the ragu (turning them to coat) and let them simmer covered for about 15 minutes. I threw in some fresh mozzarella but you can finish your dish with some shaved parm of whatever you like. It is your food, make it your own. Enjoy!

Salmon Patties with Quick Pickled Slaw and Spicy Mayo

It is really hard for me to actually decide what I want to eat, I rarely have a craving for things so I end up buying things I don’t really want to eat right away. I shop almost every day to get what I want for dinner that evening and breakfast the next morning but I can’t do that now so I bought things I had to put in the freezer; before now, I had smoothie fruit, beer glasses and giant ice cubes in my freezer….

I bought a rather large piece of salmon from Costco and made one piece fresh, reluctantly put the rest in the freezer. Long story short, I ended up defrosting it on a day I didn’t want to eat it so I seasoned it and threw it in the oven at 425 for ~20 minutes, cooled it and put it in the fridge for later (I hate to waste food). This is how this recipe was born, I love crab cakes so why couldn’t I use salmon?!?

Note: I won’t lie, my husband asked “do we have cereal as plan B?”. He thinks he is funny.

This is what you will need for ~4 normal sized patties:

  • 2 cups cooked and flaked salmon (I seasoned with salt and pepper when I cooked it and made sure the pieces were really small)
  • 1 cup binding agent plus more for coating later (see note)
  • 1/4 red bell pepper (diced very small)
  • 1 green onion sliced down the middle and sliced thin (~halfway up the green part too)
  • 1 heaping tbsp minced chives (you can use fresh or dried)
  • 2 cloves of garlic finely minced
  • 2 tsp spices (I used Italian seasoning that has an amalgam of spices or you can use anything you like such as parsley, dill, oregano, etc. mix however you want)
  • a heavy pinch of salt and pepper (I used the Borsari savory salt I put on everything)
  • 1 egg, beaten
  • 1.5 tbsp mayo
  • 1.5 tbsp Dijon mustard
  • 1/2 lemon zested and squeezed
  • 1 tbsp olive oil

Note: I used the Keebler Club crackers I had in my drawer but you can use just about anything like panko, potato chips, pork rinds (for low carb), saltines, regular bread crumbs (but I would use seasoned for this), or any seasoned cracker. Just make sure they are crushed really well and don’t have any large pieces.

I mixed the salmon, binding agent, bell pepper, green onion, chives, garlic, and spices in a bowl. Then, in a separate bowl, I mixed together the salt and pepper, egg, mayo, garlic, lemon juice and zest plus the olive oil then I combined the two making sure it was evenly combined.

I portioned them out into four patties, really pressing them together so they didn’t fall apart then rolled them in some extra binding to give the outside some “crunch”; this is in addition to the 1 cup you put in the mixture. I put in the fridge to firm up while I made the slaw:

What you will need for the slaw (but you can use anything you have like cucumber, red onion, daikon, kohlrabi, radish, etc.):

  • 1 cup of green cabbage, sliced thin
  • 1 cup of red cabbage, sliced thin
  • 1 cup of shredded carrots
  • 4 peeled and shaved radishes
  • 1/2 cup seasoned rice vinegar
  • 1/2 cup white vinegar
  • 1 tbsp sugar
  • 1 tsp salt

Put the vinegars, salt and sugar in a saucepan and bring to a boil. While that is getting to temp, slice the vegetables and place in a glass or metal bowl. When the liquid comes to a boil, pour over the vegetables and stir to combine; set aside.

The cakes can sit in the fridge as long as you want, just make sure it is at least 20 minutes. Place 2 tbsp of oil in a pan and heat For maybe 3 minutes at medium high heat, this is where your choice of oil is important. Grape seed oil has a very subtle and clean taste with a very high smoke point so it is pretty forgiving, this is the oil I use mostly but you can use olive oil also. I wouldn’t use vegetable, corn or canola oil but you can if that’s what you have.

When the oil is ready, place the patties in the pan and let sit (undisturbed) for maybe 3 minutes then turn over when brown and cook on the other side until brown and warmed through. Remove to a plate let sit for a few while you make the mayo:

What you will need for the mayo:

  • 1/4 cup mayo
  • 1 tbsp sriracha
  • 3/4 tsp soy sauce

That’s it, mix together and put in a bottle to “drizzle” or you can place in a ziplock bag and snip the corner so you an squeeze over the cakes.

To serve the slaw, just pull from the bowl and drain well before plating. Place a handful on the plate with the patties and drizzle with the mayo. I sprinkled over additional chives and some cilantro over the slaw. That’s it, enjoy!

Easy, no knead, delicious Cheddar Jalapeño bread

So I took the easy, no knead, delicious bread recipe and just added the jalapeños and cheddar, so easy. So good.

As I always say, it is your food so make it your own. Add anything you like, just try to stay within the same textures and quantities (substituting the jalapeños and cheese only if I were you, baking is kind of a science).

As with the other bread, you will definitely would want to have a scale, an electronic scale, if possible but I realize not everyone has one so I will give you the measurements for both. I cannot make any guarantees on the bread made using anything other than a scale….

For the scale/measuring cup:

  • 430 grams/ 3 cups flour (see note)
  • 1 gram/ 1/4 tsp active dry yeast
  • 8 grams/ 1 1/4 tsp salt
  • 345 grams/ 1 3/4 cup water or half water/half beer or all beer (why not right?)
  • 3 jalapeños (2 diced and 1 sliced into rings) – it is always important to remember to identify the level of spice you want here, if you want it less spicy definitely remove the ribs and seeds before dicing.
  • 2 1/2 cups of shredded cheddar cheese – I would use extra sharp and look for Cracker Barrel or Tillamook if you can’t get good quality small batch cheese (like from Whole Foods).

Note: For this recipe, I would use white flour so the flavor of the jalapeños stand out.

So you mix everything in a bowl except 1/2 cup of the cheese and the sliced jalapeños and stir, no proofing the yeast or anything else; just mix together until combined and cover with plastic wrap.

I set mine on the countertop for about 20 hours. You have options here. You can put it in the refrigerator for a couple of days for a slow rise or you can let sit for a little as 12 hours but the longer it sits, the better it tastes. For however long you decide to let it rise, just know you shouldn’t go to the next step until you see small bubbles on the surface of the dough but you will not notice much of a change in the volume of the dough at this point.

For the second rise you need to turn the dough onto a lightly floured surface and turn it over itself once or twice. Just take the right side and fold it over to the left and the left side over to the right, kind of like folding it in half. Cover it again with plastic wrap and let it sit for a bit, I left it for ~30 minutes.

Drizzle some olive oil into a bowl and make sure it coats the bottom and sides then place the dough into the bowl seam side down. Cover with a cotton cloth and let sit for a couple of hours, I left it for ~3 hours.. Now you will need a heavy pot (cast iron is best) with a lid or you can fashion one out of another pan or something but whichever vessel you use (I used a large cast iron Dutch oven), you need to place in a 450 degree oven while it preheats, I left it in the oven for 30 minutes.

Once the heat time has elapsed, carefully remove the pan from the oven (I did not heat with the lid) and place on the stovetop. Dump the dough from the oiled bowl into the hot pan, don’t worry too much about how it looks in the plan as it will flatten out during cooking. You can shake it around to distribute better but I am of the belief the less you touch that 450 degree pot, the better off you will be. Brush some oil I’ve oil on the top of the bread and sprinkle the reserved cheese and slices of jalapeños.

Place the lid on the pot and relocate to the oven for 30 minutes. Remove the lid after 30 and bake for another 15 and that’s it! Crusty on the outside and moist on the inside, a truly delightful bread! You can get fancy if you want but this is a simple bread for people who don’t like the complication of baking bread, add whatever you would like but it is simply perfection on it’s own.

This is a photo of the “plain” bread as I haven’t taken a photo of the other…..

Easy, no knead, delicious bread

Okay I know you think that title is an oxymoron but I swear it isn’t! It is time consuming in terms of “waiting” but hands-on time is literally about 10 minutes.

You definitely would want to have a scale, an electronic scale, if possible but I realize not everyone has one so I will give you the measurements for both. I cannot make any guarantees on the bread made using anything other than a scale….

For the scale/measuring cup:

  • 430 grams/ 3 cups flour (see note)
  • 1 gram/ 1/4 tsp active dry yeast
  • 8 grams/ 1 1/4 tsp salt
  • 345 grams/ 1 3/4 cup water or half water/half beer or all beer (why not right?)

Note: you can use white or wheat or half of each, you can use rye or toss in some seeds. The type of flour isn’t really that important, break flour or AP flour, white or wheat, whatever. Make it your own!

So you mix everything in a bowl and stir, no proofing the yeast or anything else; just mix together until combined and cover with plastic wrap.

I set mine on the countertop for about 20 hours. You have options here. You can put it in the refrigerator for a couple of days for a slow rise or you can let sit for a little as 12 hours but the longer it sits, the better it tastes. For however long you decide to let it rise, just know you shouldn’t go to the next step until you see small bubbles on the surface of the dough but you will not notice much of a change in the volume of the dough at this point.

For the second rise you need to turn the dough onto a lightly floured surface and turn it over itself once or twice. Just take the right side and fold it over to the left and the left side over to the right, kind of like folding it in half. Cover it again with plastic wrap and let it sit for a bit, I left it for ~30 minutes.

Drizzle some olive oil into a bowl and make sure it coats the bottom and sides then place the dough into the bowl seam side down. Cover with a cotton cloth and let sit for a couple of hours, I left it for ~3 hours.. Now you will need a heavy pot (cast iron is best) with a lid or you can fashion one out of another pan or something but whichever vessel you use (I used a large cast iron Dutch oven), you need to place in a 450 degree oven while it preheats, I left it in the oven for 30 minutes.

Once the heat time has elapsed, carefully remove the pan from the oven (I did not heat with the lid) and place on the stovetop. Dump the dough from the oiled bowl into the hot pan, don’t worry too much about how it looks in the plan as it will flatten out during cooking. You can shake it around to distribute better but I am of the belief the less you touch that 450 degree pot, the better off you will be.

Place the lid on the pot and relocate to the oven for 30 minutes. Remove the lid after 30 and bake for another 15 and that’s it! Crusty on the outside and moist on the inside, a truly delightful bread! You can get fancy if you want but this is a simple bread for people who don’t like the complication of baking bread, add whatever you would like but it is simply perfection on it’s own.

I’ve also created a blog for jalapeño cheddar bread so click here to see how to convert…..

Lamb Chops are easier than you may think…..

I think you are going to be quite surprised at how easy lamb chops really are! First, let’s talk chops….

There are essentially two different types of lamb chops: pork loin chops and pork chops. Pork loin chops look like small T-bone steaks and lamb chops look like little bone-in ribeye steaks; specially named loin chops or rib chops if you are being technical. I prefer the rib chops just because it is a more consistent experience, the loin chop is, as the description identifies, has two different textures. One is much more tender than the other just as is in the T-bone steak.

Let us forget the loin chop for now, I will address them in a later blog.

So I have tried a couple of different ways to purchase the rib chops: individual chops and whole “Racks” which are literally called “rack of lamb”. You can preppare the “racks” whole/intact or slice for individual ribs; you can even roast whole to the desired temperature, slice and sear which is referred to as a “reverse sear” which I will get into when it gets to my steak blog. For the purposes of this blog (and simplicity), I am working with individual rib chops.

I have purchased individual rib chops at Whole Foods and a rack at Costco. Amazingly enough, the taste was equal. Chris enjoyed both very much and had no indicator they were not exactly the same. Equally shocking (All things equal), I believe the rack ended up being slightly more expensive than the individual chops at Whole Foods. My point: six of one, half dozen of another. I wouldn’t however, recommend buying them from a Jewel or Mariano’s due to quality. Indulge me on a rant for a quick moment….

Taking into consideration simple supply chain knowledge, large scale, “box box” on the corner types of markets gain the benefit of volume discounts which they pass on to their customers. Win-win for everyone of course! That, for me, is important when you are purchasing 1:1 such as canned tomatoes, potato chips, sparkling water, etc. when you wouldn’t necessarily care about where you were buying it more than you would about the brand you love, I am not buying bathroom tissue at Whole Foods because I like a certain brand they don’t sell. Don’t buy your lamb chops at Jewel because they are, by default, purchasing a slightly lower quality meat than Whole Foods which you pay for handsomely.

Costco does put a good emphasis on what they are purchasing and from whom they purchase so they tend to be a little more expensive when it comes to meat also but it is worth it. I rarely purchase all my ingredients from one market so I spend a great deal of time purchasing and prepping the meals, if you do not have time to do that then do what’s best for your of course. IF I have to choose two markets, it would be Whole Foods and Jewel focusing more on Jewel for the bulk of the shop. Off my soapbox, back to the chops….

If you purchase the rack just be sure to slice them as close to the bone of the next chop as you can getting the most of the meat on one side of the chop; just slide your very sharp knife down the bone and through the flesh.

If you are purchasing individual chops, the butcher may ask if you want them “frenched”. I don’t bother with that, it is just pushing the fat from the bone down closer to the flesh to show a more dramatic separation of the bones; I do it myself when I get home. He (she?) may not ask, depends on where you purchase them.

Now, here is the actual important part, prepping for the actual cooking and you won’t believe how easy it actually is: bring to room temperature, season with olive oil and salt (see note) and heat the pan. Yep, that’s it.

Note: I use Boursani Savory Seasoned Salt for this and everything else! It is a little expensive at ~$14 for a jar but it really enhances the flavor of almost anything, especially these chops. I dump it in my salt container on the stove and sprinkle it on everything!

I use a cast iron pan and, if I haven’t lectured you on that already please do get one, heat it with a little olive oil until smoking. You can use grape seed oil also which has a higher smoke point but I like the flavor of olive oil but it must be noted that I have a very sensitive palate and can taste very subtle differences. You may not notice and the lack of smoke is key if you don’t have an industrial or restaurant grade ventilation system to help to eliminate it.

When the pan has reached the correct temperature, I would say heat it for maybe 5 or 7 minutes, lay the chops into the hot pan. You can use tongs if you like but, whatever you do, be certain to lay them AWAY from you so you don’t splatter your skin. WhatI mean by that is to set the chop part into the pan and “push” it away from you all the way into the pan, laying the bone toward the back of the stove.

The second most important part: do not touch them until it is time to turn. The true sear comes from the consistent and direct contact with the hot pan (think about cooking scallops), this is how that beautiful crust is formed.

Most enjoy these chops at a medium to medium rare temp which is about 2 minutes per side for the “normal” sized chops; if you find the ends be a bit larger, just add a minute per side. Let rest for ~7 minutes and that’s it, you are ready to eat!

I serve mine with a vegetable puree of some sort and a sautéed vegetables. The crust of the meat mixed with the texture of the puree is a delight for your palate but you should serve with whatever you prefer. See my blog on cauliflower puree to get some tips on making these if you’d like, you can find it here.

Happy eating and please do let me know how you like it!