Egg Salad: don’t let the name fool you, it is definitely not boring!

Of course the most important thing about egg salad is how you cook the eggs and I definitely have a preference: hard cooked. I like the additions to the egg to flavor the salad but you certainly can cook them less and allow a creamier yolk to reduce the additions. I will provide information for both but whatever you do, don’t let anyone tell you more yolks aren’t better; they make the dish!

Now for the eggs, I will use 6 for this blog…..

Start a pan large enough to fit the eggs filled half full of water over high heat (make certain the amount of water will cover the eggs when you place them in the pan), make sure it has a tight fitting lid. When the water reaches a rolling boil, remove the eggs from the refrigerator (they need to be cold) and place in the pot with a slotted spoon, add a tablespoon of baking soda and put the lid on the pot. Turn off the heat.

Let the eggs sit for:

  • 12 minutes for hard cooked
  • 9 for medium cooked
  • 7 minutes for soft cooked

Just before you have reached the desired time to let the eggs sit, make an ice bath in a bowl large enough to hold your eggs and not send water over the edges when you put them in the bath.

Once they have set for the time you desire, dump the hot water but leave the eggs in the pot.  Put the lid back on and shake the pot well, banging around the eggs to really crack the shells. Remove the lid and dump the eggs in the ice bath, let sit for ~5 minutes. The eggs should slip right out of the shells.

[Note: You want to make sure the eggs are not warm when you begin to assemble the egg salad so let them sit in the bath until they no longer feel warm on your hands.]

Now let’s talk about texture, you know how I feel about texture because I talk about it a lot…..

The best method for achieving the best texture of your eggs is a potato ricer, seriously just get one please. You can use it for the fluffiest mashed potatoes (see note), the smoothest cauliflower puree, easier avocado mash for guacamole, juicing quartered fruit, smashing bananas for banana bread, the list goes on and on for a tool that costs an average of $30! This is the one I have and I have had it for about 10 years, no issues and I use it on the regular!

[Note: if you boil whole potatoes for your mashed potatoes, the ricer will PEEL THEM FOR YOU! No more grated knuckles or grating your skin with that terrible peeler! Just place the hot potatoes in the ricer and press, that’s it!]

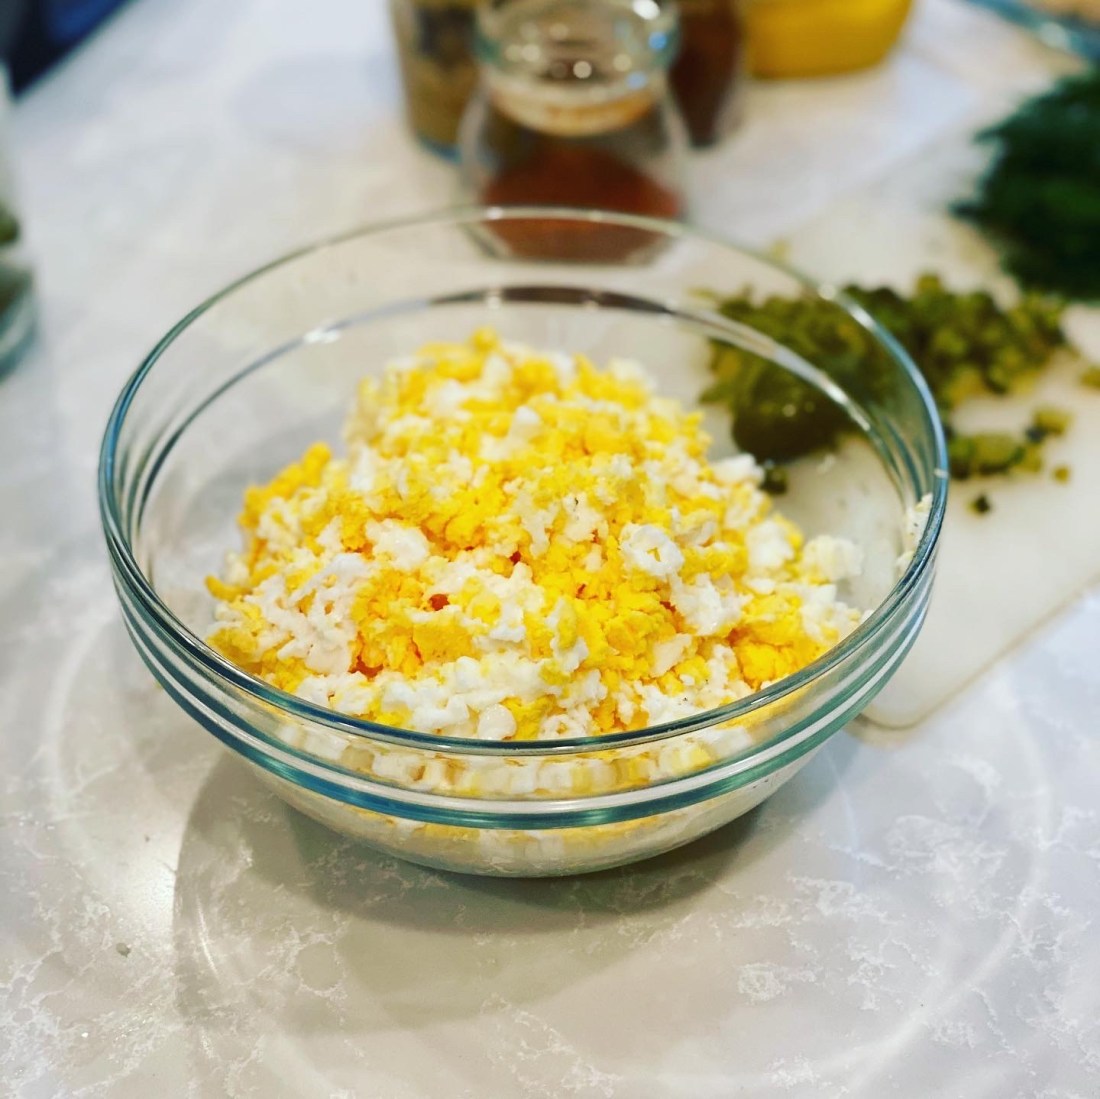
Take four of the eggs whole and place in the ricer, discard the white from two of the eggs and put the yolks only in the ricer; apply the plunger and “rice” the eggs.  Look at the consistency of these eggs, it really does make a difference!

D3292946-6A57-47AF-ADE7-98B416AB8C60

Set the riced eggs aside to cool a little more and start assembling your mise en place (your ingredients ready to mix), this helps with clean up.

I like to add the following to my egg salad but use it as a guide, add whatever you like. One thing to remember is that I purchase things I can use again for other purposes which is why I chop pickles, I can use them for another purpose instead of having a jar of relish but I wouldn’t usually use relish anyway because of the extra liquid, just an example of making your money/purchase go further:

  • Mini sweet pickles finely chopped (you can use sweet relish but it is a little watery so it can affect the final texture)
  • Fresh dill minced (you can use dried too)
  • Mini dill pickles or cornichon if you can find them (you can also use dill relish but, again, it is watery and can affect the final texture)
  • Mayonnaise (of course use Duke’s if you can find it but I make mine often, it is really easy and you have everything in your house!)
  • Dijon mustard
  • Yellow Mustard
  • Smoked Paprika
  • Cayenne
  • Salt and Pepper

Set it all out, chop the things that need chopping and have everything ready to add as you need it.

C71E2945-5B85-48FF-888B-627624C8995A

For six eggs, I usually start with ~1 tbsp of mayo because you don’t want it to be too “runny”, I add in a generous squirt of yellow mustard, a tsp of Dijon, a small dash of cayenne, ~1/2 tsp paprika, three small pickles (sweet and dill each so six total) and about a tbsp of the dill. Mix together and add about three churns of sea salt and fresh pepper (from the mills) or a dash of salt and pepper. Sea salt only please, don’t use that crap in the round blue paper can…..

If it seems a little dry for your liking, I would add more yellow mustard. This will add more flavor without a significant amount of calories, more mayo gives it a more bland flavor. Add small amounts, mix well and evaluate for consistency; if you need to add more, just do it with very small amounts at a time.

The bread, the glorious bread. It is no secret how I feel about bread…..

The bread here is really important and I am a big advocate of making your own bread (click here for my easy and quick crusty bread recipe that you can make in ~2 hours!) because it can be used for so many things. Granted, it doesn’t last as long as store bought bread but that’s okay because it gets better with age for french toast, regular toast, croutons, bread pudding, etc. Just make a loaf and toast it up for a fresh egg salad sandwich!

There are two schools of thought on sandwich bread, soft and pillowy or thick and crusty; you need a hearty bread to stand up to a good egg salad. If you don’t want to make your own bread, buy one of the baked loaves from the market bakery because it is just a good! Whether it is homemade or store bought, slice it thick (discard the ends or save to dip in hummus!) and toast just enough to have the outside crusty but the inside remains softer.

That’s it really, slather some egg salad on the bread and enjoy while the bread is still a little warm from the toaster. Add whatever you like, think about some chopped arugula or spinach to bulk it up and add some texture, maybe some raw red onion or bacon to amp it up a little. Use whatever you have to make it your special dish, it’s your food so make it your own!

AA4A343C-5CC2-475C-BD54-F1E309DDBE03


Easy, no knead, delicious Cheddar Jalapeño bread

So I took the easy, no knead, delicious bread recipe and just added the jalapeños and cheddar, so easy. So good.

As I always say, it is your food so make it your own. Add anything you like, just try to stay within the same textures and quantities (substituting the jalapeños and cheese only if I were you, baking is kind of a science).

As with the other bread, you will definitely would want to have a scale, an electronic scale, if possible but I realize not everyone has one so I will give you the measurements for both. I cannot make any guarantees on the bread made using anything other than a scale….

For the scale/measuring cup:

  • 430 grams/ 3 cups flour (see note)
  • 1 gram/ 1/4 tsp active dry yeast
  • 8 grams/ 1 1/4 tsp salt
  • 345 grams/ 1 3/4 cup water or half water/half beer or all beer (why not right?)
  • 3 jalapeños (2 diced and 1 sliced into rings) – it is always important to remember to identify the level of spice you want here, if you want it less spicy definitely remove the ribs and seeds before dicing.
  • 2 1/2 cups of shredded cheddar cheese – I would use extra sharp and look for Cracker Barrel or Tillamook if you can’t get good quality small batch cheese (like from Whole Foods).

Note: For this recipe, I would use white flour so the flavor of the jalapeños stand out.

So you mix everything in a bowl except 1/2 cup of the cheese and the sliced jalapeños and stir, no proofing the yeast or anything else; just mix together until combined and cover with plastic wrap.

I set mine on the countertop for about 20 hours. You have options here. You can put it in the refrigerator for a couple of days for a slow rise or you can let sit for a little as 12 hours but the longer it sits, the better it tastes. For however long you decide to let it rise, just know you shouldn’t go to the next step until you see small bubbles on the surface of the dough but you will not notice much of a change in the volume of the dough at this point.

For the second rise you need to turn the dough onto a lightly floured surface and turn it over itself once or twice. Just take the right side and fold it over to the left and the left side over to the right, kind of like folding it in half. Cover it again with plastic wrap and let it sit for a bit, I left it for ~30 minutes.

Drizzle some olive oil into a bowl and make sure it coats the bottom and sides then place the dough into the bowl seam side down. Cover with a cotton cloth and let sit for a couple of hours, I left it for ~3 hours.. Now you will need a heavy pot (cast iron is best) with a lid or you can fashion one out of another pan or something but whichever vessel you use (I used a large cast iron Dutch oven), you need to place in a 450 degree oven while it preheats, I left it in the oven for 30 minutes.

Once the heat time has elapsed, carefully remove the pan from the oven (I did not heat with the lid) and place on the stovetop. Dump the dough from the oiled bowl into the hot pan, don’t worry too much about how it looks in the plan as it will flatten out during cooking. You can shake it around to distribute better but I am of the belief the less you touch that 450 degree pot, the better off you will be. Brush some oil I’ve oil on the top of the bread and sprinkle the reserved cheese and slices of jalapeños.

Place the lid on the pot and relocate to the oven for 30 minutes. Remove the lid after 30 and bake for another 15 and that’s it! Crusty on the outside and moist on the inside, a truly delightful bread! You can get fancy if you want but this is a simple bread for people who don’t like the complication of baking bread, add whatever you would like but it is simply perfection on it’s own.

This is a photo of the “plain” bread as I haven’t taken a photo of the other…..

Easy, no knead, delicious bread

Okay I know you think that title is an oxymoron but I swear it isn’t! It is time consuming in terms of “waiting” but hands-on time is literally about 10 minutes.

You definitely would want to have a scale, an electronic scale, if possible but I realize not everyone has one so I will give you the measurements for both. I cannot make any guarantees on the bread made using anything other than a scale….

For the scale/measuring cup:

  • 430 grams/ 3 cups flour (see note)
  • 1 gram/ 1/4 tsp active dry yeast
  • 8 grams/ 1 1/4 tsp salt
  • 345 grams/ 1 3/4 cup water or half water/half beer or all beer (why not right?)

Note: you can use white or wheat or half of each, you can use rye or toss in some seeds. The type of flour isn’t really that important, break flour or AP flour, white or wheat, whatever. Make it your own!

So you mix everything in a bowl and stir, no proofing the yeast or anything else; just mix together until combined and cover with plastic wrap.

I set mine on the countertop for about 20 hours. You have options here. You can put it in the refrigerator for a couple of days for a slow rise or you can let sit for a little as 12 hours but the longer it sits, the better it tastes. For however long you decide to let it rise, just know you shouldn’t go to the next step until you see small bubbles on the surface of the dough but you will not notice much of a change in the volume of the dough at this point.

For the second rise you need to turn the dough onto a lightly floured surface and turn it over itself once or twice. Just take the right side and fold it over to the left and the left side over to the right, kind of like folding it in half. Cover it again with plastic wrap and let it sit for a bit, I left it for ~30 minutes.

Drizzle some olive oil into a bowl and make sure it coats the bottom and sides then place the dough into the bowl seam side down. Cover with a cotton cloth and let sit for a couple of hours, I left it for ~3 hours.. Now you will need a heavy pot (cast iron is best) with a lid or you can fashion one out of another pan or something but whichever vessel you use (I used a large cast iron Dutch oven), you need to place in a 450 degree oven while it preheats, I left it in the oven for 30 minutes.

Once the heat time has elapsed, carefully remove the pan from the oven (I did not heat with the lid) and place on the stovetop. Dump the dough from the oiled bowl into the hot pan, don’t worry too much about how it looks in the plan as it will flatten out during cooking. You can shake it around to distribute better but I am of the belief the less you touch that 450 degree pot, the better off you will be.

Place the lid on the pot and relocate to the oven for 30 minutes. Remove the lid after 30 and bake for another 15 and that’s it! Crusty on the outside and moist on the inside, a truly delightful bread! You can get fancy if you want but this is a simple bread for people who don’t like the complication of baking bread, add whatever you would like but it is simply perfection on it’s own.

I’ve also created a blog for jalapeño cheddar bread so click here to see how to convert…..