I love food. I love to cook it, talk about it, eat it, see pictures of it and (now) blog about it. I don’t take myself too seriously and like to think my humor is one of my best assets (others...probably not so much). I’m doing this to share my love with strangers and hope to encourage you to step out, enjoy and share your experiences. #sharethelove
So I know you all think that all I do is go to the market and buy all of these ridiculous ingredients (sometimes I do) but I mostly inventory what I have about to turn and make a meal out of that. Seriously, it is my goal to let everyone know how easy cooking can be. If you don’t have a main ingredient, just use what you have. It is your food, make it your own!
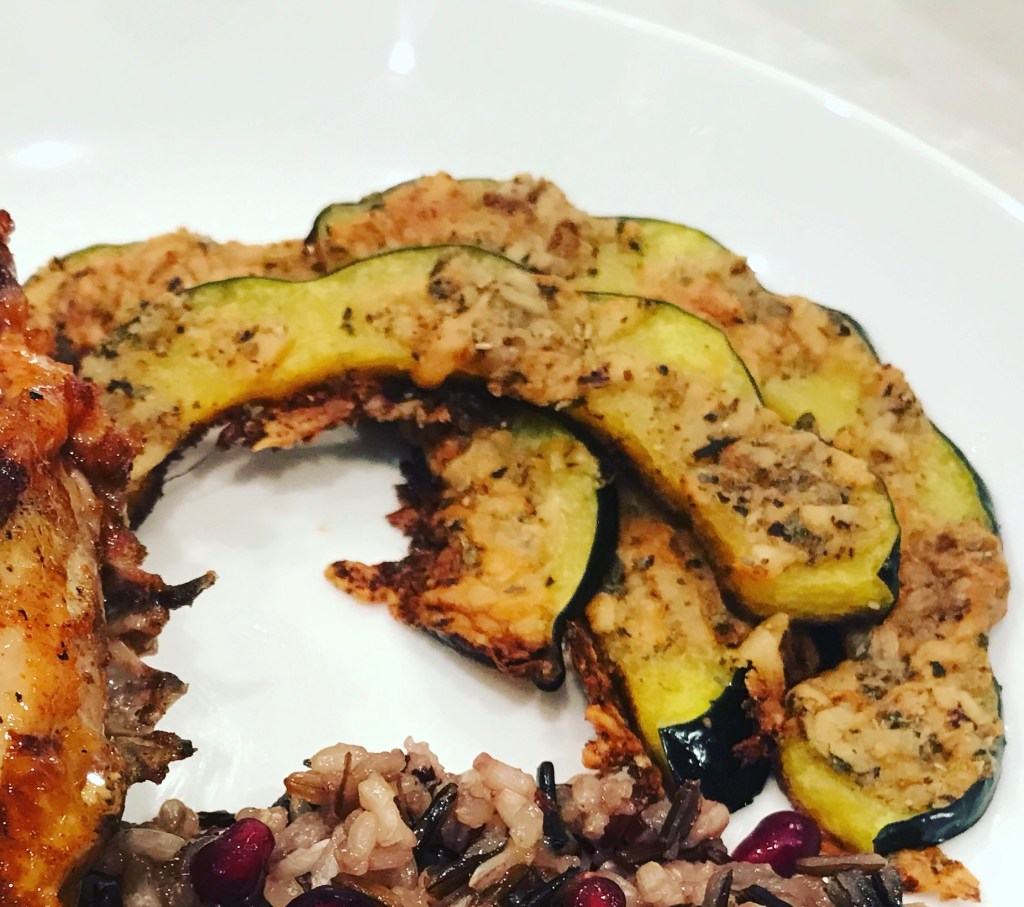
I served this chicken with Parmesan Herb Acorn Squash and Wild Rice with pan juices and let me tell you this: I could have just eaten the squash. It was uh-maze-ing! Click the links above for the recipes.
Here is what you will need for the chicken:
1 whole chicken (you can purchase one already dissected but I choose to do that myself)
1 tsp ground coriander
1 tsp cumin
1/2 tsp cayenne
1/4 tsp salt
1/2 tsp pepper
1 tbsp olive oil
1/4 of a whole pineapple
1/2 cup pineapple juice
1/4 cup pomegranate juice
1/4 cup apple cider vinegar
1 jalapeño pepper
2 tbsp brown sugar
1 tsp smoked paprika
2 cloves garlic
Heat the oil in a cast iron pan (if you don’t have one, please just go out and get one already but you can use any heavy oven-safe skillet) and allow to heat. While the oil heats, combine the coriander, cumin, cayenne, salt and pepper in a small bowl; pat the chicken dry with a paper towel. Sprinkle the chicken with the seasonings and lightly rub into the skin. Cut the pineapple into “half moon” segments, you should have ~5 and this is only relevant because you don’t want them to be too thin or they will disintegrate in the pan.
When the oil sizzles, place the chicken in the pan skin side down. Allow the chicken to sit, undisturbed and uncovered, for 3-5 minutes to allow the skin to get crispy; remove to a plate. Add the pineapple to the pan and place the chicken, skin side up, back into the pan and place in a preheated 425 oven. Cook for ~45 minutes until the juices from the breast run clear or the temperature reaches 165 degrees at the thickest part of the breast (be sure not to touch the bone). Careful not to cook too long or the other pieces will dry out.
While the chicken cooks, combine the juices, pepper, paprika, sugar, vinegar and garlic to a saucepan and cook until it thickens; maybe about 15 minutes.
Once the chicken reaches the desired doneness, brush with the pomegranate pineapple “syrup” and place back in the oven for about 7 minutes. Remove the pan from the oven and serve the chicken with a slice (or two) of the pineapple and a drizzle of the pan juices and a sprinkling of pomegranate seeds.
Check out the other recipe from this meal via the link above or below (I won’t give you the wild rice recipe, it was just the organic wild rice you get in a bag at the market):
So this is a super easy and healthy recipe that is a good accompaniment to almost any protein (except maybe fish but hey, its your food so make it your own!). Don’t stress that you missed a step here, you don’t peel the squash because the skin is perfectly edible and delicious just make sure to wash it really well before you cut it.
Here is all you need:
1 acorn squash
1/2 tbsp butter (melted)
1/2 tbsp olive oil or avocado oil
1/2 cup Parmesan (grated or shredded, please no green can Parmesan-ish stuff)
1 tbsp Italian seasoning
2 cloves of garlic (minced)
Pinch of salt and pepper
Note: You can use any type of herb but I really like the Italian seasoning for this dish but use your fave!
Slice the squash through both ends (so, essentially, you will be cutting the stem end in half) and clean out the seeds; slice in 1/4 inch slices (just make sure they aren’t too thin). Arrange the slices on a lined baking sheet and combine all other ingredients in a small bowl, cover each piece with the mixture. This is like Goldilocks, it could be too much, too little or just right depending on the size of your squash. Don’t sweat it, just make more if you need to but don’t “over coat” if you have too much.
Bake in a 400 degree oven for 25 minutes unless you don’t have two ovens and are cooking with the chicken. I didn’t want to bother with heating the second oven so I just placed in the same oven with the chicken at 425 and cooked for ~20 minutes and it was perfect. You have options here.
You want the cheese mixture to form a “crust” of sorts on the squash and the squash to be cooked through (just pierce it with a fork). Enjoy!!
Did you know that the best way to eat a cupcake is to turn it into a Sandwich? Seriously, if you remove the wrapper and pull the cupcake in half, you can make a sandwich and not get icing all over your face by placing the bottom half on top of the frosting. It is like magic really….. Enough about that.
I may be biased but these chocolate cupcakes are one of the best I have ever had. They are moist and sweet but not too sweet but the frosting…. The frosting! Perfection, sheer perfection….
This is one of the recipes that I do not believe has to be particular about adding the wet to the dry, you can jut throw it all in together except for the water, that is a critical step where timing is important.
Here is what you will need:
1 cup plus 2 tbsp cake flour
1 cup sugar
7 tbsp unsweetened cocoa powder
1 tsp baking powder
3/4 tsp baking soda
1/2 tsp salt
1/2 tsp espresso powder (you can use instant coffee granules If you have to)
1/2 cup buttermilk
1/2 cup butter (melted)
1 egg
1 tsp vanilla
1/2 cup boiling water
Mix together buttermilk, melted (and cooled) butter, egg (beat well before adding) and vanilla.
In a separate bowl, combine flour, sugar, cocoa, baking powder, baking soda, salt and espresso powder; stir well to combine (or use your mixer).
Combine wet and dry and mix until well combined, add the boiling water; the batter will be very “loose” but that is how it is supposed to be.
Place in muffin tins and bake for 15 minutes at 350.
Meanwhile, make the frosting:
1 block of cream cheese (at room temp)
1/4 cup of butter (at room temp)
2 tsp vanilla
2 tbsp sour cream
1 tsp lemon zest
1 quick squeeze of lemon juice (no more than 1/2 tsp)
3 3/4 cup confectioners sugar (please make sure it is confectioners sugar)
Mix cream cheese, butter, sour cream, vanilla, lemon zest and juice until well combined and there are no lumps. Add sugar and mix until combined.
If you don’t have a fancy piping bag with metal tip, just do what I do and use a gallon sized Zip-loc bag. Place the corner of the bag into a large drinking glass and fill with frosting. Cut the tip off and squeeze on the cupcakes in a circular motion!
So I have a friend with the most adorable kids and I am working with her weekly on new dishes and ideas to feed them; it is really a ton of fun. Every week when I leave, I ask them what they want to cook next time and one week they asked for syrup so, of course, I obliged.
This syrup can be made with raspberries, strawberries, blackberries and blueberries; you can even combine them into one! It’s your food, make it your own!
It is super easy and tasty for pancakes, ice cream, cake, waffles, anything you could put a compote or syrup on. You could even try some on French Toast like in this blog. Use your imagination.
What you will need:
2 cups of blueberries
3/4 cup of water
1/4 cup white sugar
1/4 cup brown sugar (I like dark but you can use light)
2 tsp corn, tapioca or arrowroot starch
Dash of cinnamon
1 lemon
Clean the blueberries of stems and place in a medium saucepan with 1/2 cup of water and the white sugar. Bring to a boil and search for anything rising to the top that could have been on the berries (stems or leaves, etc.) and add the brown sugar and remaining water combined with the starch (to thicken it up) plus a dash of cinnamon.
Boil for ~5 minutes and turn to a simmer for ~15 minutes Stirring occasionally to prevent the sugar from sticking to the bottom and sides (use a rubber spatula to use a folding motion along the sides and bottom). Test for sweetness and alter as necessary, add a little zest and a small squeeze of lemon and let cool.
You can either blend to have a smoother consistency, use as it for a chunkier experience or strain and use the solids for a butter or smoothie!
Should last ~2 weeks in the fridge but I am sure it won’t. Enjoy!
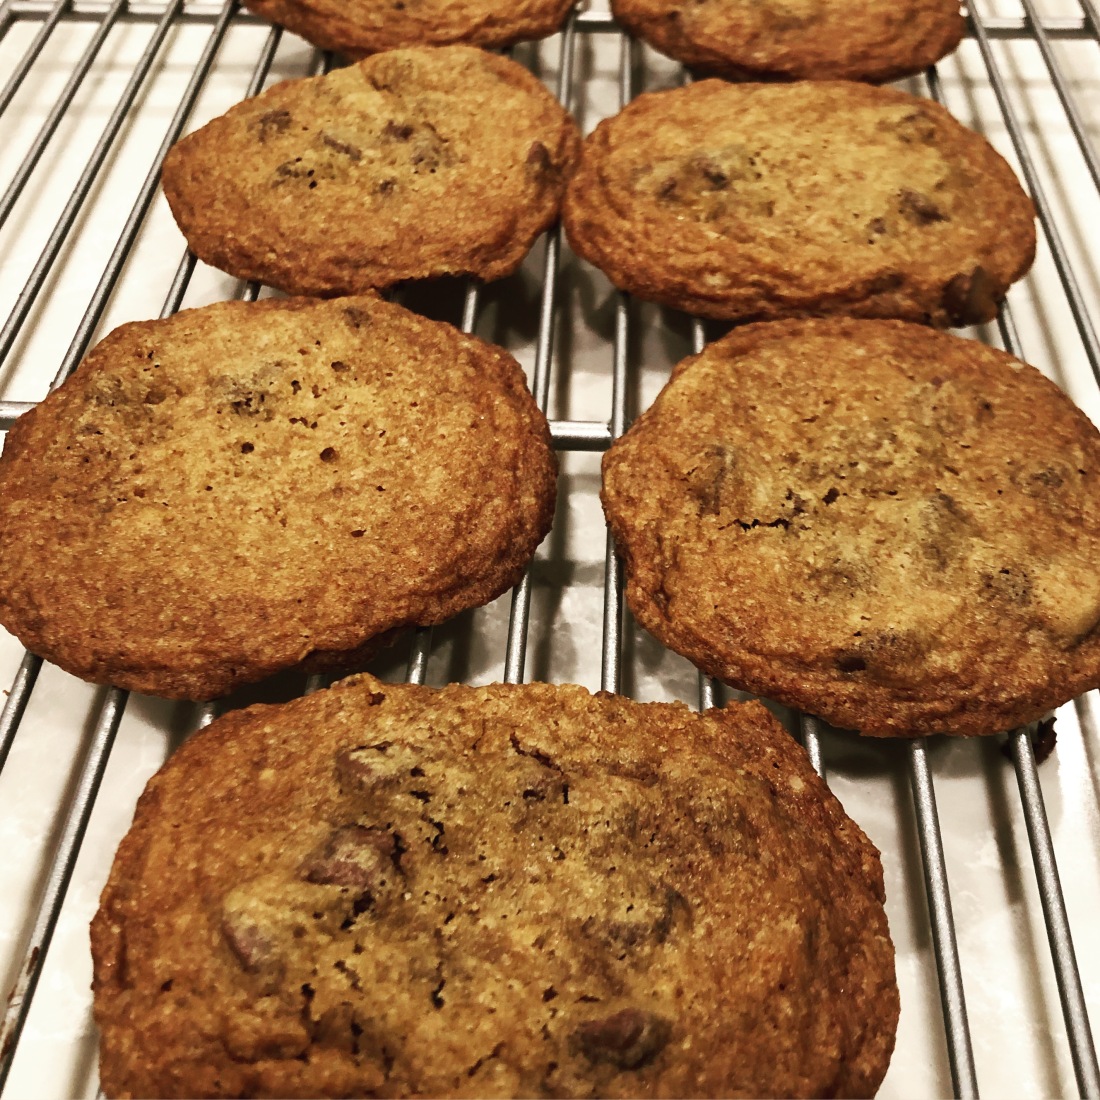
So, these cookies are the flat and crispy on the outside kind so don’t expect the dense cake like cookie here; these are the male-y crispy sweet goodness kind of cookies.
First things first, you must start with room temperature everything. Take your butter* and eggs from the fridge at least an hour before you begin to cook.
Pro Tip: If you are short on time, you can unwrap the butter and place it on a plate with a glass bowl on top which speeds up the softening process.
When creating the dough for any cookie it is vital to follow the order indicated which usually indicates mixing the dry in a separate bowl and combining with the wet after that is combined. There is generally a reason for this however explaining the science of that is boring so I will skip right past that. Here are a few things to consider when making any cookie:
If the recipe doesn’t indicate specifically the type of flour, look for baking powder or baking soda. If the recipe lists that as an ingredient, use All Purpose Flour (AP) and if it doesn’t, look for another recipe because nothing good comes out of self-rising flour.
If the recipe calls for “extra large” eggs, I always beat one extra egg and add half. If the recipe is a detailed to indicate the size eggs to use, don’t alter anything until you try it first, this is a seriously thought out process so don’t discount that value.
You don’t ever need to add the eggs “one at a time”, just make sure you beat them really well. Generally you are adding the eggs to other wet ingredients so you can’t hurt the batter; if it tells you to add the eggs to dry ingredients for a cookie, move on and don’t make those bricks.
Vanilla is a beautiful addition to any baked good, feel free to be liberal when adding this but never add less. Never.
Baking power and baking soda are NOT the same thing. Please don’t ever make that mistake
Never use salted butter (in anything except that beautiful gold brick of goodness Calle Kerrygold to slater on toast). You want to control the amount of salt in all dishes.
Take that round paper can of Morton Salt and use it to put out fires only, use the box of Morton Kosher Salt when including in recipes. Maldon Sea Salt Flakes are simply perfection when sprinkling on cookies or fudge.
It is always a good idea to chill dough before you bake cookies, peanut butter, sugar, and chocolate chip cookies benefit the most from this.
You cannot turn a simple sugar cookie recipe into a “cut out cookie” recipe, it will not hold up.
You can add nuts, candies, toffee, oats, etc. to any cookie recipe, just don’t overdo it. Always remember to toast your nuts please, you will thank me later.
Invest in either vanilla beans or Madagascar vanilla, it makes all of the difference. If you are going to use that “imitation vanilla extract” crap, just buy chips ahoy. The beans aren’t necessary and maybe not worth the effort unless you are making ice cream so go with the Madagascar variety, you can get a giant bottle at Costco.
You can make the “balls” and freeze them then bake one (or 5) at a time. Just put them on a pan in the freezer so they don’t touch until they are frozen solid then move to a more space friendly container. Bake an additional 3-5 minutes depending on your oven. Just watch them for doneness and make note for future baking.
Here is what you will need:
2 cups flour
1 1/4 tsp baking soda
3/4 – 1 tbsp kosher salt
Dash of cinnamon
2 sticks of butter (softened)
1 1/4 cup brown sugar (I like dark)
1/2 cup white sugar
2 eggs
1 tbsp vanilla
2 cups semi-sweet chocolate (I like to purchase a chunk and put in chunks and shavings but chips work nicely also). For the love of all things good, please do not use Milk Chocolate. Please….
Mix together the dry ingredients, you can use a whisk, sifter or fork; just make sure it is combined. Okay, if I am being honest, you can add them all in the same bowl as the wet without combining first but it is a good practice to mix them separately.
Note: I have a stand mixer but I always use my hand mixer for this because you can mix gather dough too much (quite easily actually) which results in a funky texture. Just use your hand mixer or a wooden spoon, nothing fancy needed here.
Cream the butter and sugars together until they look a little “fluffy” (read: it is creamy without any noticeable lumps of butter) then add the eggs And vanilla making sure you beat them well as no cookie every survived that gross stringy egg white that didn’t get incorporated enough.
Add the dry ingredients to the wet and beat until halfway incorporated then toss in the chocolate (and nuts or candies or anything you wish to add here), continue to mix until just combined. Chill for a couple of hours (one hour minimum but overnight is great).
One thing I recommend you invest in here is a cookie scoop, it really helps make sure all cookies are the same size (it is not about aesthetics, it is about cooking time). Scoop out the cookies on a large lined baking sheet (I highly recommend the Reynolds Non-Stick Aluminum Foil for this) making sure there is room for them to “spread” without touching and bake in a 325 degree oven for ~15 minutes. I always bake on the second lowest rack to take advantage of the slightly higher heat which appears to assist with the crispy-ness.
Ovens are different so the time is specific to your oven specifically. They should look a little underdone when you pull them out, watch them closely.
I suggest, also, sprinkling with a touch of the Maldon Sea Salt before baking. Give it that extra something special. Enjoy!!!
As an extra bonus for you, here are some of the things I like to add to cookies, add one, add all. You can omit the chocolate and add anything else, they are your cookies so make it your Fro-Yo:
Bacon (um, a million times yes!)
Plain M&Ms
Dried Cranberries
Nuts, any (toasted please)
Oats (toasted please)
Banana Chips
Toffee
Caramel Bits
Coconut
Raisins
Whatever you have in your pantry, just. Make sure the moisture content is very (very) low.
If you know me, you know I pride myself on being charcuterie ready and no, it is not just meat and cheese. A couple of important things to know about charcuterie:
cheese is polarizing, make sure you have at least one milder and traditional type cheese; some people just can’t go with the funk that is taliggeo
the vehicle to carry the goodness from board to mouth is important, offer a variety (I will always go back to texture and how important it is)
Load up the board, the more the better!
You want things to encourage people to try something new and from every aspect of taste: salty, sweet, spicy, creamy, crunchy, etc.
I always make too much so you will have to play with quantities If you do make too much, throw it in a ziplock and add to an omelette or salad the next day! Waste not, want not….
Cheese: Move over cheddar, there’s something funkier (but not too far, we still love you bunches)
Essentially there are seven “types” of cheeses, you want to choose a variety and not duplicate types on one board. Unless you are serving a large group, I would stick to four cheese to start. Following are the types of cheeses*:
Fresh and Aged cheese (no or insignificant rind): Ricotta, mozzarella, cottage cheese
Soft White Rind: Camembert, Goat, Brie
Semi-Soft: Edam, Taliggeo, Munster
Hard*: Cheddar, Pecorino, Manchego, Parmesan
Blue: Stilton, Gorgonzola, Roquefort
Customized: Cheeses with additives like dill, peppers, truffles, etc.
*Note: These cheeses are typically okay for people who are lactose intolerant, they can have at least a little of this cheese traditionally.
Obviously you do not want to include cheese from the first bullet (which I combined the first and second “type” because no one really cares about them in this context) and the rest is up to you. You definitely don’t want to use only one type but the variations within each type gives you a good amount of flexibility. For example, I traditionally omit the “blue” type simply because I don’t love this variation.
My recommendation for this blog will be soft rind, hard, customized and semi-soft especially if you are a charcuterie newbie but it is good even if you have been doing it forever; again, it is your food, make it yours.
If you are looking for some go-to cheeses to keep in your repertoire, following are my suggestions but look around, get samples and add a fun new one each time. Step out of the box with one cheese each time, broaden your cheese horizons:
Mustard Seed Cheddar – Customized
Triple Cream French – Soft White Rind
Manchego – Hard
Ossau Iraty – Semi-Soft (could be hard, depends on the aging)
Smoked Gouda – Hard
Meat: Please do not call Pepperoni Meat when discussing charcuterie (that’s cheese and crackers)…
The options for the actual meat portion of the board are less varied than cheese, there are still tons but the variations are often nominal. I like to stick to the ones that offer a distinct variety in terms of texture, moisture and size but just make sure you don’t have three types of salami and you will be fine. Following are the types of meats that I go to generally, always trying to mix it up a little:
Prosciutto*
Peppered Salami
Bresaola
Finocchiona
Spicy Capicola
*If you can find duck prosciutto, grab it! It has an amazing texture and it’s drier so it is between a jerker and prosciutto without the earthly duck flavor that comes to mind. Trust me…
Getting the Goodness in your Belly
As with meats and cheeses, the options to port said meats/cheeses to your mouth is pretty much endless but I will stick to breads/crackers for this portion of the post (the really good stuff follows later on).
You really want to have a couple of different options depending on what you are serving on the board but you can’t go wrong with the variations below:
Sliced baguette
Almond Crackers
Melba Toast
Pumpernickel Squares
Triscuits
Water Crackers
Two or three of the above referenced bits will be great until you get really comfortable with your charcuterie skills. Really, it is not that serious.
The Accoutrements are Key
I am huge on adding fun things to a charcuterie board so I would like to give you some thoughts on what to put on the board and some suggestions on how you pair them, you can even create one specific pairing from the board and set it on a small plate to demonstrate to your guests what you had in mind!
Some of the things to consider when fleshing out your board ( this is just to get you thinking, you can add literally anything):
Cornichon (each and every time)
Olives
Smoked Almonds
Marcona Almonds
Candied Pecans or Walnuts
Fig Jam
Cranberry Sauce
Honey
Dijon Mustard
Sweet Drop Peppers
Pear
Dried Figs
Pickled Vegetables or Jalapeños
Roasted Beets
Blanched Asparagus Pieces
Melon (cantaloupe or honeydew)
Let’s talk about the pairings
If you think about the flavors you enjoy you can put together most anything from a charcuterie board. Following are some of my favorites:
Brie with cranberry sauce and Candied Pecans
Goat with Roasted Beets and Candied Walnuts
Blanched Asparagus with Pecorino
Brie with honey and pear
Manchego with dried fig and Peppered Salami
Braseola with Mustard Seed Cheddar and Dijon Mustard
Prosciutto with melon and Ossau Iraty
Get where I am going with this? Think about the things you like and put those on the board. I know you are probably tired of hearing me say this but it is your food, make it your own!
Please share your thoughts and photos on IG @chigirlcooks. I would love to hear from you…..t
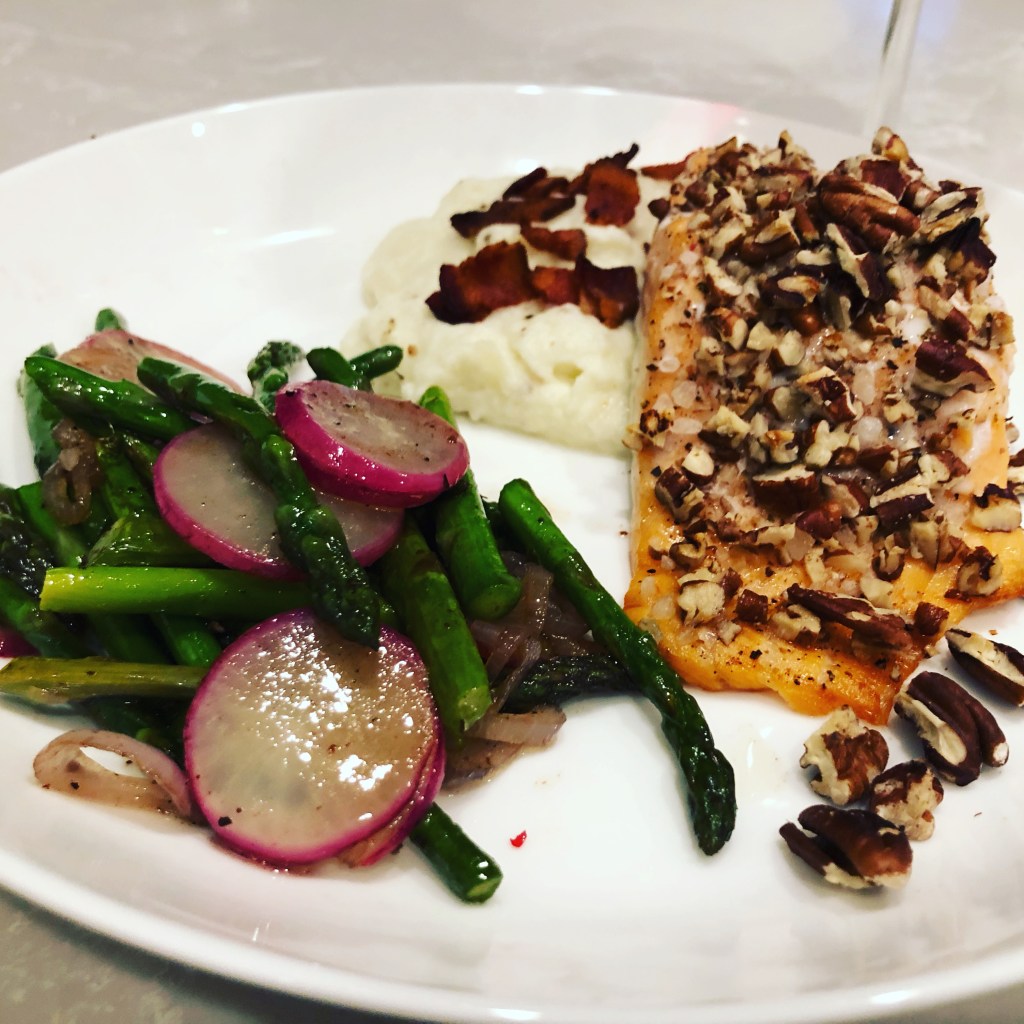
I had a request from my lovely sister to give her something with no carb/no sugar which is something I do love to do so I stepped it up! My friend Jen was coming over for dinner so I thought why not make Pecan Crusted Salmon with bacon cauliflower purée and an asparagus, radish and shallot sauté which was divine if I say so myself. Please don’t ask me where I came up with the menu, these things just come to me in my sleep; it is kind of ridiculous how obsessive I am about food…
Note: Nothing is actually “no” carb or sugar but it is nominal and non-impactful to your body in a negative way.
Let’s start with the salmon.
As I mentioned in a previous post, where you buy your seafood is important. It should be sustainable or sourced in a way that is both safe for you and not harmful to the environment; it also shouldn’t make you sick. There is nothing worse than food poisoning, trust me. I found this blurb on what to look for, perfect and succinct about what to look for:
Look for shiny skin; tightly adhering scales; bright, clear eyes; firm, taut flesh that springs back when pressed; and a moist, flat tail. Saltwater fish should smell briny; freshwater fish should smell like a clean pond. When buying white-fleshed fish, choose translucent-looking fillets with a pinkish tint.
If you have a seafood market or Whole Foods just go there, seafood is important. I go to several markets to buy my ingredients, different stores offer different things but that’s for another blog.
Here is how I prepared the fish, so simple…..
2 6oz skin on fresh salmon filets
1/2 cup chopped pecans
Sea salt and fresh Ground Black pepper
Salt and pepper the salmon, add 1/4 cup pecans per filet and bake on a lined baking sheet/pan for 15-20 minutes at 400. Chris likes the skin so I serve skin on but you can easily slip the spatula between the flesh and the skin to remove it when it is fully cooked; it is up to you.
Pillowy Luscious Cauliflower Goodness
What you will need:
1 head cauliflower
sea salt and fresh ground pepper
heavy cream (please don’t use anything else here)
unsalted butter
So a head of cauliflower makes enough purée for two people really (nice size servings so be prepared to buy more if you have a family). Nothing specific about the type you buy just get a larger head.
Note: This is not one of the things I believe I have to purchase as organic if that matters.
Cut the florets from the stem, removing the green leaves and harder stems at the bottom makes it easier to get to the core; you can’t go wrong here so don’t stress it. Break them into smaller florets with your hands so they cook evenly and put in a pan adding water until it just covers the top of the cauliflower. Cook at medium high heat (slowly boiling) for ~10 minutes; you know when it is done when it begins to look less opaque and more translucent. You will know it when you see it.
***DO NOT SKIP***This is the most important part because there is nothing worse than runny cauliflower and there is nothing you can do to remove that excess water after it is too runny. Drain the florets in a colander/strainer and let sit for a while to ensure all of the water has drained from the florets, lay on a lined baking sheet and place in a 400 degree oven for ~5 minutes to really dry out the extra water. As I mentioned previously, I am not one for exact measurements so you have to be careful here. *** DID YOU DO THIS?!?!?***
Make sure it is cool enough to handle and place in your Nutribullet (if you don’t have one, use a blender and get a Nutribullet immediately); warm about 2 tbsp of heavy cream and a couple tbsp of butter in a sauce pan and place a small amount in with the florets. Blend until it is a thick smoothie-like consistency, you may have to add small amounts of cream/butter and I cannot stress enough: DO NOT ADD TOO MUCH LIQUID.
When you see the full amount of cauliflower “whirring” around, you are good to place in the hot pan (you will have relocated the cream/butter mixture to a small bowl by this time); basically you just want to make sure you have blended all of the chunks. Add salt and pepper to taste and cream/butter if you would like a looser consistency. This, again, it up to you and you should make it exactly as you or your family would like it.
I didn’t forget about the bacon, it is coming…..
If You Have to Eat Vegetables, Eat These
What you will need:
4 slices of uncooked bacon
regular size bunch of thin asparagus*
1 bunch or bag of radishes, skin on
1 large shallott
sea salt and freshly ground pepper
Note: I purchased a regular size bunch of thin asparagus (if you can find it, always go for the smaller stalks as they tend to be more tender and sweet) and separated in two; put aside the other half for another day.
So simple here, I chopped the bacon and cooked in a larger frying pan; removed the bacon to a paper towel and poured out the excess bacon grease. I didn’t wipe out the pan, I just poured out the excess.
Snap off the ends of the asparagus and throw them away, I do this in bunches of maybe 5 or 6 pieces. I sliced the asparagus pieces in half with a diagonal cut (which isn’t relevant but it looks good).
Tip: Asparagus has a natural “break” so you can bend it toward the end and it will give at the place where you want to stop eating it. Trust it, it knows what it is doing.
Slice ~4 radishes in thicker slices, I got about 4 or 5 slices per radish and cut half the shallot as thin as possible.
Tip: Shallots have two parts (one root, two separate pieces) and this is always confusing to me as to how much to use. In this recipe, I am using one of the two parts and only using half of that piece so 1/4 of the whole shallot.
I put the asparagus, radish and shallot in the pan and sautéed for ~7 minutes but be careful not to overcook the asparagus, the radish turn almost translucent when it is done so watch for that. Sprinkled with salt and pepper and that’s it. Seriously, so simple right?
Of course then I added the bacon to the cauliflower purée as a topper because bacon makes everything better!
I hope you enjoy it as much as my friend and I did!
Note: This blog is about how I used one specific ingredient but I hope it inspires you to think about how to repurpose leftovers and eliminate waste.
How often do you find yourself with leftovers? Quite often I would imagine and bread is one of the things you don’t really know how to handle. You don’t want to eat it again since it won’t be warm and fluffy from the oven so what do you do? I found myself in that situation just the other day, I try not to waste food…..
I was meeting friends for happy hour so I made dinner for Chris just before I left, he loves those canned croissant rolls; I wasn’t going to be home so they were the perfect accompaniment to pot roast and mashed potatoes on a cold Chicago night. I found five left when I got home so I placed them in a container like the rest of the leftovers and went about the rest of my night. Then I started thinking about it, what can I do with those rolls….
So first let me admit I am obsessive about food, seriously obsessive. So I have a mental inventory of what I have in my pantry (admittedly I don’t routinely take things from a box, bag or jar so it isn’t a plethora of goods but it isn’t paltry either) and I started going through that. Ah ha, I have a can of dark sweet cherries so maybe something for breakfast because I also have some whipped cream from the last pumpkin pie I made, I should make a sweet bread pudding! I feel asleep resting easy that I knew what I was making for breakfast and I was going to use things I already had.
So first thing in the morning I started the oven (350) and the coffee. I grabbed the rolls and started tearing them into smaller bits and throwing them into a bowl then I opened the can of cherries and chopped about half in smaller pieces; combined the bread and cherries and tossed in some sliced roasted almonds.
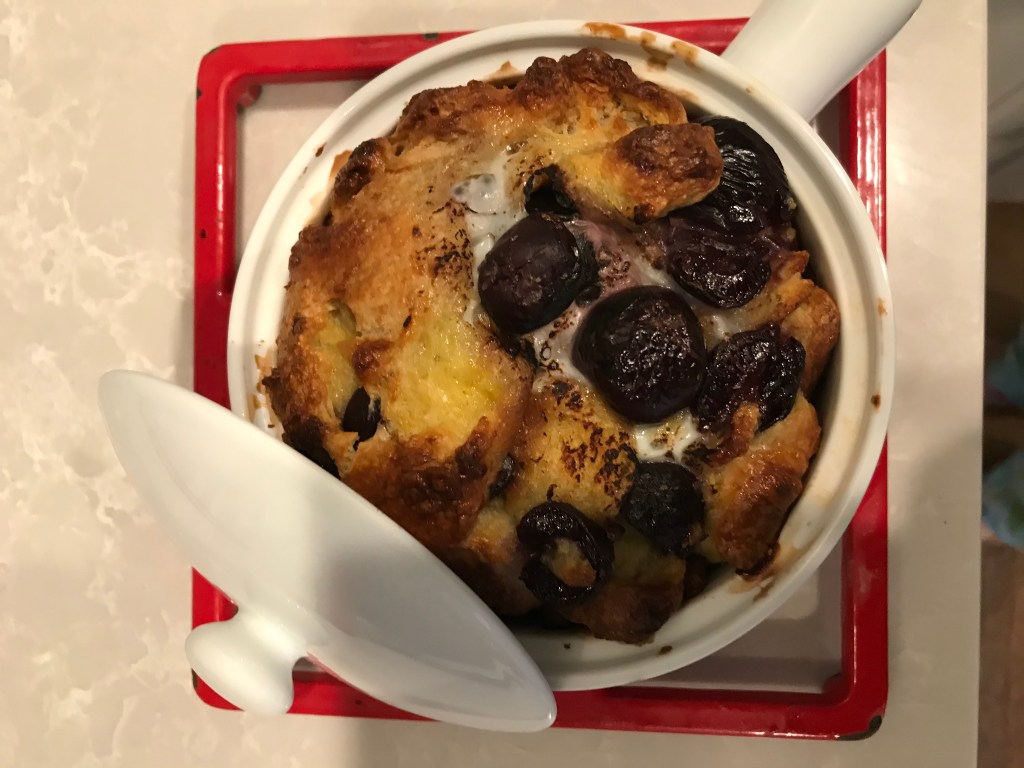
I was making one serving for Chris (I don’t generally eat breakfast) so I thought two eggs would do the trick so I cracked them into a bowl and added some whole milk and salt/pepper for the custard. I love white dishes so I have some cute one serving dishes just perfect for bread pudding so I put the bread, nut and cherry mixture into the dish and poured over the custard; baked for ~30 minutes.
Fresh from the oven…..
You know it is done when the bread puffs and raises above the rim. If you look closely you can see the egg white that I didn’t blend good enough which is ugly but tastes fine so I went with it. I removed it from the dish for serving since that dish was super hot and I felt like I wasn’t quite finished with it yet.
I just felt like I needed a little something more to make it extra decadent so I pulled out the syrup I made last week and the blueberry pomegranate jam and honey; placed the all in a pot and simmered for 5 minutes. This was the best part!
Note: Yes, I make my won syrup and it isn’t hard at all, I bet you have the ingredients in your cabinet right now to make it yourself too!
I poured the syrup over, extracted some seeds from a pomegranate and topped it with a little more toasted almonds; I sprinkle everything with sea salt before serving, not too much but just enough to balance out the sweet. You know I had to squirt some whipped cream on the side too….
That’s it, took me maybe 10 minutes of actual work time so it was super easy and I had everything on hand! Try it sometime when you have leftover bread, some nuts and fruit in the house and any kind of syrup hanging around. Make it your own and repurpose something that would have likely gone to waste.
Okay so it is really cold outside so something hot is usually what people want first thing but no one wants (read: no one in their right mind) a huge bowl of mush. Sure, oatmeal is super healthy and a go to for so many for that very reason but it doesn’t have to be an unpleasant experience in any way. Let’s talk about what’s important…
The Basics
A good foundation is the most important.
Steel Cut vs. Anything Else? Steel Cut All The Way
Since they are one of the healthiest grains you can eat , start your day right and there is zero reason to choose anything else; they are third only to Oat Groat and Oat Bran. They are only steamed and toasted so the processing is minimal and you get the full benefit of the grain.
Build the Foundation
All you need to start a good oatmeal is Steel Cut Oatmeal, Brown Sugar and Milk; everything else is optional and based on your preference (I have included walnuts in my photo above because they are a non-negotiable for me). I would highly recommend adding salt, vanilla and cinnamon at a minimum to ensure a complete rounding of flavor.
Note: when I say “salt”, assume I am referring to sea salt unless I indicate otherwise. Always.
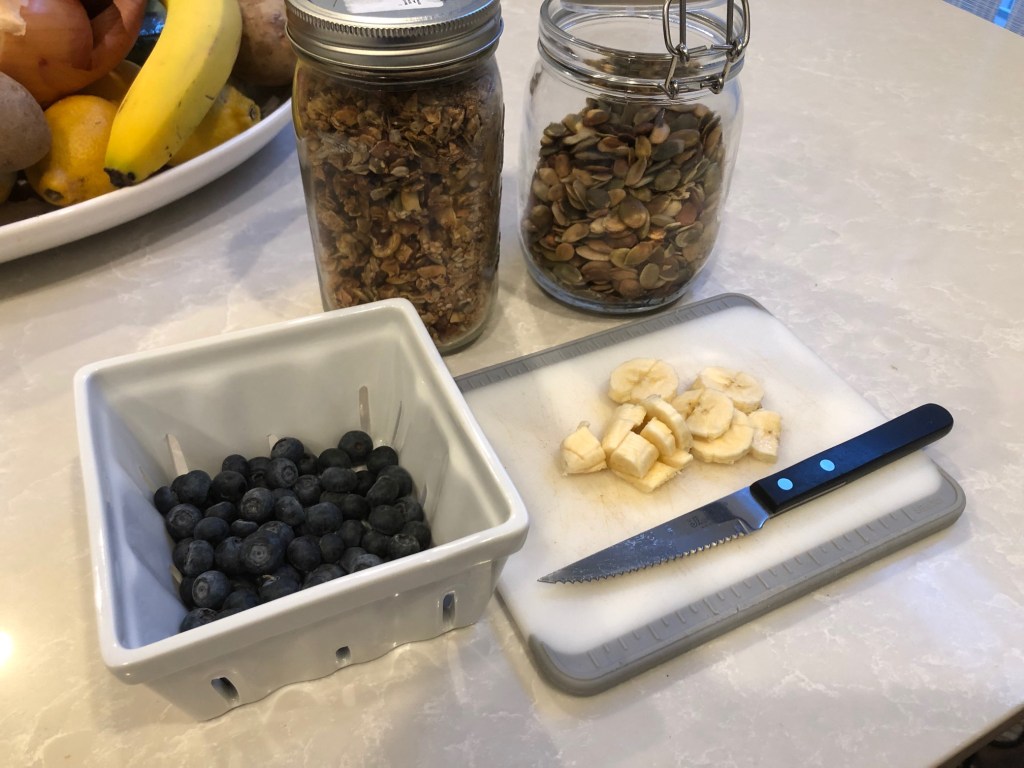
This morning I made for Chris Banana Walnut Oatmeal Topped with Fresh Blueberries and Bananas, Paleo Granola and Roasted Pumpkin Seeds so I based this blog on that but your options are endless; I almost never make the same oatmeal twice. Use what you have in your cabinet, you really can’t go wrong.
It takes almost no time for the oatmeal to cook (~20 minutes) so I throw everything in at the beginning. For a single bowl of oatmeal, I start with one half cup of oats and cover with milk (you will continue to add as it cooks to your desired consistency) then sprinkle in a pinch of salt and cinnamon, a tablespoon of brown sugar and a dash of vanilla. Turn to medium heat until it starts to boil, stirring frequently; careful as it can dry and burn to the pan easily. Dice half of a banana and crumble some walnuts, toss them in now also, this leads to a mixture texture within the oatmeal itself.
While the oatmeal cooks, start gathering the toppings. I diced the other half of the banana, grabbed the last of the blueberries, some paleo granola and roasted pumpkin seeds. Whole Foods has an amazing paleo granola with coconut if you don’t want to make it and pumpkin seeds are great to buy in bulk as they don’t really “spoil”.
The secret to a really nicely constructed oatmeal is equal distribution of the texture so I put the same thing on the bottom of the bowl before I spoon the oatmeal as I put on the top*! Sprinkle some granola on the bottom, spread the fruit evenly across the bottom and add some pumpkin seeds, spoon in the oatmeal and top with the same thing as the bottom.
Tip: This is the same for yogurt also, blog about that coming soon…..
The photos and food you see I make on this blog are things I would make and do on any day, not just for the blog. It’s important you know I obsess about how things look since you eat with your eyes first. Don’t do it to the degree I do (you will make yourself crazy) but I do think presentation is important (IMO).
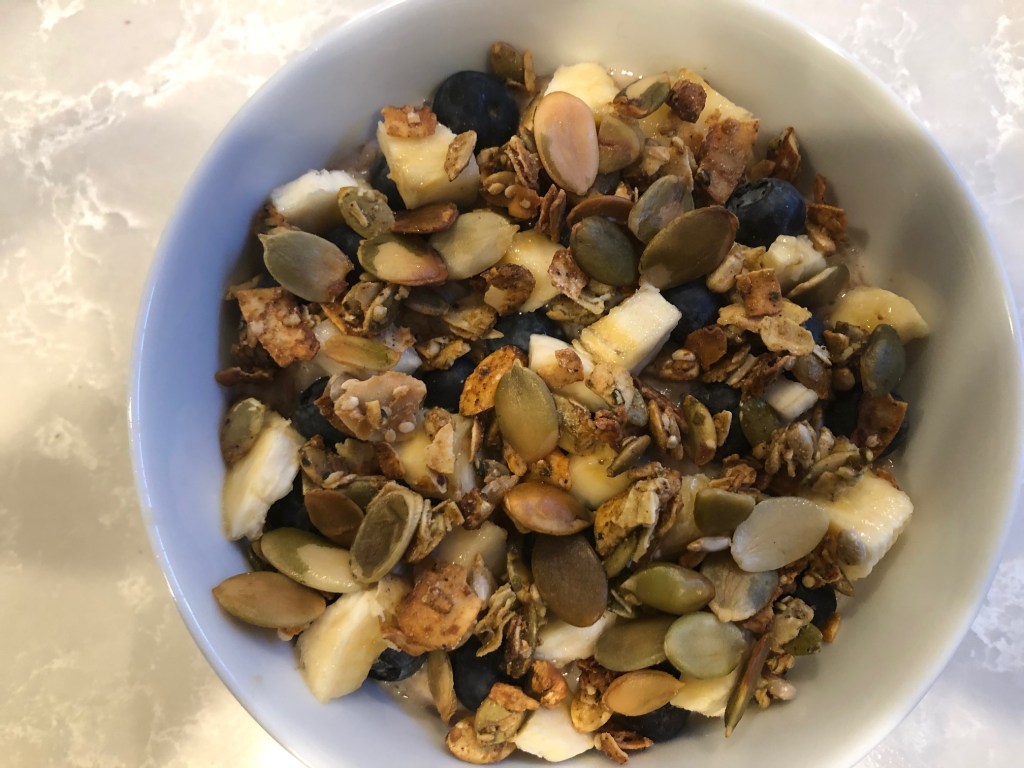
Following is a photo of the finished product and I always have these cups on hand for to-go coffee and yogurt/oatmeal on the go; keep everything the temperature you desire for a while. I highly recommend them. Hope you enjoy……
Banana Walnut Steel Cut Oats Topped with Fresh Bananas and Blueberries, Paleo Granola and Roasted Pumpkin Seeds.
If you like spice but want to tame it, it’s simple; add something sweet and what’s better in the fall than sweet potatoes?
I prepared a pork tenderloin with a spicy crust and paired it with mashed sweet potatoes and roasted broccoli with citrus to brighten it up a bit; it was getting a little “heavy”.
I used ~1.5 lb tenderloin and didn’t even trim it, they do a pretty good job at trimming them if you purchase a good one so splurge a little and save yourself some time and wasted meat because I always gauge it when trying to clean….
I marinated it in pineapple juice (just the large can) with some of the chipotle chile powder and brown sugar for a couple of hours.
Always rinse it and pat dry to eliminate any residual gross smelling liquids (I can’t think too much about meat or else I won’t be able to eat it so I try to make it as clean as possible), rub with some olive oil and set aside.
Make the Crust
In a small bowl mix together the following:
4 tsp garlic powder
3 tbsp chipotle chile powder*
2.5 tsp sea salt
2 tsp pepper
.5 cup finely copped toasted pecans (toast extra for later use, great to have on hand)
8 tbsp brown sugar (use light, darker will result in more of a burned look)
* You can add more or less depending on your desired level of spice but remember the sweet potatoes will offset the spice a good bit.
[Note: you may have more than you need so don’t cross contaminate and save for the next time. I have about 20 of these types of jars for storing everything from rice and nuts to spices. I got mine from Ikea but they have them at Target and Craft Stores]
Prep the Tenderloin
Pour some of the crust onto a cutting board or plate and place the tenderloin on top to coat the bottom and coat the rest focusing on the sides and ends; firmly pressing it into the flesh. Place in the refrigerator for at least 30 minutes and up to 12(ish) hours (so overnight to okay). Just make sure to bring it to room temperature before putting in the oven.
Cook
Don’t be like most of our mothers and cook the poor thing to obliteration. I swear it took me years to consider eating pork as an adult for dread of consuming actual shoe leather…
A good rule of thumb is to cook it for ~20 minutes per pound considering the ends are usually smaller and will be more “done” than the rest; that’s okay for me because I snack on those the next day. Bake at 350 degrees or throw on the grill for the same amount of time turning 4 times (so break up the cooking time to be equal per side).
The Side Dishes!!!
Mashed sweet potatoes are the perfect accompaniment for pork and even better for spicier pork and they are super simple.
Life changer: Potato Ricer…. If you don’t have one, go to Amazon right now and buy one, your potato game will be upper level immediately. Don’t buy a fancy one with interchangeable disks, I have one with square holes and it works perfect; I think I bought it at Bed Bath and Beyond. Just make sure it is large enough that you don’t have to rice and rice and rice. the receptacle should be about the size of a potato.
Again, not a specific person when cooking so grab one potato per person at the market and bake for ~1 hour; I don’t advocate boiling because you can get watery potatoes if you don’t dry enough so it’s not worth the risk for me. I just poke them with a knife several times on all sides, wrap individually in foil and throw in the oven on a baking sheet at 350.
Once they are done (you know if you can insert a knife all the way through) and cool enough to handle, unwrap, slice down the middle and scoop chunks into the ricer (see note) and rice into a larger pot. I like to mash right away even if I am not serving them for a while just because you get the best consistency when they are warm and freshly riced.
Note: It is not the end of the world if you don’t have a ricer, it just really makes a difference. If you don’t, just scoop the flesh into a pot and use the hand mixer.
I throw in a little butter, some salt and ~1 tbsp of brown sugar and mix; for a super silky mash, I run a hand mixer through them also. I blend all of this together before I add the milk (or cream) to make sure I don’t make them too watery. I splash in milk (or cream, your choice and you can even use half and half since I know you have some for your coffee) and mix with the hand mixer until they are the desired consistency over low heat. If you are going to serve them later,I would stop after mixing in the butter and spice then continue on with the milk when you are ready to serve.
Top with some of the toasted pecans and sprinkle with cinnamon if you’re so inclined, with one, both or neither is fine but the pecans add a nice texture.
Make the Broccoli
I grab about a head of broccoli for two people, wash it and cut from the stems; bite size pieces in varying sizes is fine, don’t waste too much time on it. I place it in a large bowl, toss with some olive oil, salt, pepper and garlic them place on a lined baking sheet; bake at 450 degrees for ~20 minutes. When it’s done squeeze half of a lemon (see note) over the broccoli and shave some zest evenly over, top with some Parmesan and serve immediately.
Note: I wash my hands and squeeze the lemon into my hand letting the juice run through my fingers trapping the seeds before they escape. No fancy tools needed.